Sweet Home Quilt Along - Week 3

Sweet Home Quilt Along - Week 3

SH_Sweet Home Bungalow Blocks-08.jpg

Welcome to the third week of the Sweet Home Quilt along hosted by (me) Sharon Holland, Maureen Cracknell, and Jennifer Jones. We’re halfway through the quilt along and excited to connect with the Sweet Home quilt makers on our Instagram community and here on our blogs!

I hope you’ve been following along on all three hosts blogs and Instagram accounts as we’re each making different versions of this quilt and let me tell you I’m loving ALL OF THEM!! See what I mean when you search the #SweetHomeQAL hashtag on Instagram.

Sweet Home Weeks Graphic 3.jpg

If you’re just joining us you’ll probably want to pop over to the Sweet Home Quilt Along - Week 1 post to get caught up. Purchase the Sweet Home quilt pattern from my SHOP here.

If you’ve been following along since the start then you should already have your fabrics cut out and Log Cabin blocks assembled.

Sweet Home QAL Schedule.jpg

The quilt along will run six weeks total and we’ll cover a different aspect of piecing or finishing for that week. Some of you are working ahead and that’s wonderful—it’ll give you more time for the quilting and finishing portion. This quilt along is very relaxed. If you feel like completing the top in a week—go for it! But, if you’re a beginner and want more instruction along the way—we have that too in the form of LIVE and recorded Instagram tutorials over on my IGTV channel on Instagram. I just added a Bungalow Block tutorial on Monday of this week.

I’ve recorded step by step tutorials for you to access on my @sharonhollanddesigns IGTV channel on Instagram and so far the Sweet Home Quilt series covers fabric selection, Log Cabin block, and Bungalow block construction.

Sweet Home Bungalow Blocks-11.jpg

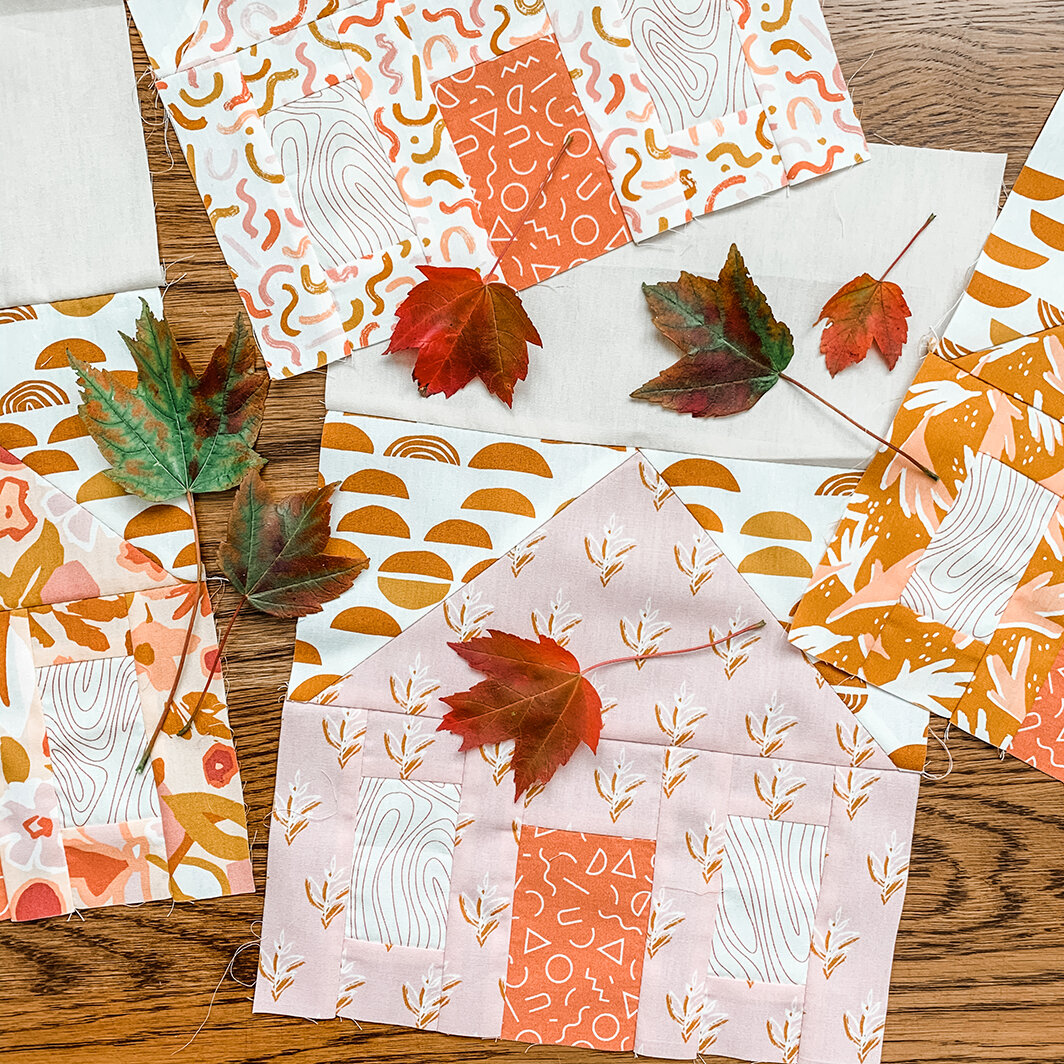
Today we talk about piecing the Bungalow blocks. I’m using Art Gallery Fabrics Terra Kotta prints mixed with AGF Pure Solids Sandstone for the background and one of my Spirited prints for half of the Log Cabin block roofs. The Sweet Home Terra Kotta kit can be purchased from Fat Quarter Shop.

SH_Sweet Home Bungalow Blocks-01.jpg

Once you’ve made one Bungalow block all the way through and are comfortable with the construction you can utilize chain piecing to help speed up the repetitive sewing steps.

SH_Sweet Home Bungalow Chain Piecing-09.jpg

In the photo above, I’ve added all the long strips to one side of the window units without clipping the threads. Once the same sewing step has been applied to all the pieces needed for the Bungalow blocks I remove the chained pieces, snip the connecting threads and add the long strip to the opposite side before moving on to the next step.

SH_Sweet Home Bungalow.jpg

When constructing the roofs for both the Log Cabin and Bungalow blocks there’s usable trimmings from the Flippy Corner construction. I’ve been saving all my trimming and am planning to make something scrappy from them in the near future.

HST Pile.jpg

If you’re looking for some ideas of what to do with those leftover half-square triangles (HST) units, take a look at an oldie but goodie blog post were I show examples of what to do with leftover HSTs to create new quilt blocks.

HST pillow.jpg

If you don’t want to commit to making another quilt from leftover HST scraps then why not think smaller and make a pillow? I had a similar stack of half-square triangle (HST) trimmings when Maureen and I hosted the AGF Heart Quilt sew along earlier this year. If you’d like some inspiration for a pillow project, read about my pretty pillow that also uses Chenille-It Blooming Bias for an added bit of fun!

SH_Sweet Home Bungalow Blocks-04.jpg

Just like the Log Cabin construction, you’ll find the Bungalow block uses much the same piecing techniques. The window sections are assembled in a Log-Cabin fashion and the base of the Bungalow comes together quickly—especially if you’re chain piecing. The roof is constructed exactly like the Log Cabin roof only minus the chimney.

SH_Sweet Home Bungalow Blocks-06.jpg

If you’re working with a directional print for your roof like I am then you’ll want to either watch my Instagram IGTV video for this block construction or read about Controlling Directional Prints in Patchwork Units on my tutorial post.

Sweet Home Bungalow Blocks-12.jpg

Next week we’ll be making the corner squares and attaching sashing to blocks.

I’m enjoying seeing your postings to Instagram and following along on your progress—you’re all are doing amazing and beautiful work on your Sweet Home quilts!

Sweet Home QAL Sponsors.jpg

Don’t forget that this Friday will be a new Friday Giveaway with fabulous prizes from our sponsors. Be following along on Instagram as all the giveaways will be held on that platform and winners will be randomly drawn the following Monday from the #SweetHomeQAL hashtag pool. The quilt along members that post their progress photos to public account on Instagram and use the hashtag #SweetHomeQAL will automatically be entered into every Sweet Home Quilt Along drawing! It’s that easy to enter, so enter often to up your chances!

And, while you’re on Instagram, take a look at the #SweetHomeQAL hashtag on Instagram and see what the other QAL Makers are using in their quilts—it’s an amazing resource not only to see fabrics but to make new friends!

I am an Amazon Associate site and earn from qualifying purchases on the products I’ve linked below. The helpful products selected are the same or similar to materials used to make the project(s) in this blog post or related items I think you may enjoy.

Spirited Look Book - The Sundries

Spirited Look Book - The Sundries

Spirited banner 2.jpg

Today’s post is Part 3 of a closer look at the projects I made for the Spirited Look Book by Art Gallery Fabrics.

Spirited is my newest fabric collection for Art Gallery Fabrics and with every new collection, AGF publishes a virtual magazine showing you beautiful ways to sew with the fabrics. I contributed a lot of sewing projects to the Spirited Look Book and my three part blog series gives you more images and project information beyond the virtual pages. I’ve split up my blog post coverage into categories: Week 1 was all about The Quilts. Week 2 was about The Garments and this week, The Sundries (or everything else).

Spirited by Sharon Holland

Spirited by Sharon Holland

Spirited quilting cottons, knits, and rayons are shipping to quilt shops everywhere. I’ve started a stock lists of online shops for this collection on my FABRICS page and will continue to add links as more shops get their listings up. If your local quilt shop hasn’t ordered it yet, let them know you’d like to sew with these prints and feel the AGF difference for yourself at your favorite shop.

The Sundries

Chenille and Diamond Fleck pillows by Sharon Holland

Chenille and Diamond Fleck pillows by Sharon Holland

On November 21, I blogged about these fun Chenille Pillows. I love them so much and would like to make more pillows on this order maybe using the Embellished Threads and Horizon Mirage prints from the collection. The possibilities are endless with how you can use chenille to jazz up fabrics.

Extra Edited Chenille Pillows-4 webjpg.jpg

Read further on how to make the Chenille Pillow project HERE.

Extra Edited Photos-26 web.jpg

The Diamond Fleck pillow is an adaptation of the Diamond Fleck table runner (free) project by Art Gallery Fabrics. I followed the piecing directions from the pattern but scaled down the size of the blocks to better fit the size of my pillow form.

Diamond Fleck Pillow-2 web.jpg

Simple straight-line quilting on the batting-backed patchwork pillow top adds some visual and tactile texture. I used my Hidden Zipper tutorial for a professional pillow finish that can be easily removed for laundering.

Spirited collection by Sharon Holland

Spirited collection by Sharon Holland

Any of the prints in this collection would be amazing in a pillow to spice up your home. I love that Art Gallery Fabrics has 99 Pure Solids to select from and that so many of them coordinate beautifully with this collection.

Burda Style Softie Horse

Burda Style Softie Horse

Long time ago, when my kids were little I used to sew quite a bit and make stuffed animals and dolls for them to play with. I was thrilled to find this Burda Style softie horse pattern and make a horsey for my granddaughter. I’ll have an Amazon affiliate link for the pattern at the end of this post.

Horse Softie-20 web.jpg

I used the Embellished Threads Deep print from Spirited for the body and accents of Bright Star Washed and AGF Smooth Denim in Nectarine Sunrise. This was a super-fun sewing project and will delight any horse lover young or old.

Duffle Bag -09 web.jpg

I really stretched my sewing muscles this collection with a wide variety of makes. Another rewarding project is the Weekender Bag by Delia Creates. This is a free pattern that I modified to have a patchwork exterior. Again, I followed the instructions to the letter but instead of making the exterior panels from a solid cut of fabric, I improv-pieced to get the material up to size. Before assembly I cross hatch machine quilted the pieced panels for extra awesomeness and to make the fabric thicker because I used quilting cotton rather than home decor canvas.

Weekender Bag pattern by Delia Creates

Weekender Bag pattern by Delia Creates

I used leather for the handles and I’ll put my Amazon (affiliate) link for what I bought at the end of this post along with the source for the lovely by-the-yard zippers.

Duffle Bag Interior-3 web.jpg

The tutorial by Delia Creates included two interior pocket options. I like them both so I added two pockets: One large patch pocket and a large zipper pocket for the stuff you don’t want loose in the roomy bag.

Duffle Bag Interior-1 web.jpg

This bag is the perfect carry-on size. My daughter is now the proud owner of it so I will need to make another one for myself!

Drawstring Bag pattern by Made Everyday

Drawstring Bag pattern by Made Everyday

The drawstring bags weren’t a project in the Spirited Look Book but rather something I’ve sewn afterwards. I wanted something large enough to hold Christmas gifts that would be more practical than gift wrap and love how fabrics from my past collections coordinate with my new Spirited line. The top left, white and green print along with the bottom left green print are both from my Signature collection and really play well with Spirited!

The free tutorial for these bags comes from Dana Willard of Made Everyday. Dana has a fun video to walk you through the steps to make these useful bags. These drawstring bags would be a great addition to a Weekender Bag to pack sundries and laundry!

Handy Baskets by Sharon Holland

Handy Baskets by Sharon Holland

You remember the free Handy Baskets pattern I released prior to the Look Book? If you missed that post, read more about it HERE. I’ve made an update to the original PDF download as I had omitted an important cutting step. If you re-download the PDF it has been amended or you can jot down the cutting information addition to a PDF you’ve already printed out. The addition is highlighted in bold print below:

PREP

From the cork:

Cut three 18'' x 8-½'' (directional) strips for lining then cut into three 8-½'' x 16'' strips (for three baskets).

Handy Basket Reversible web.jpg

Using cork as the lining gives these baskets a sturdy shape that wipes up easily. The construction of these bags makes them fully reversible, as well!

Apple Season Coasters by Sharon Holland

Apple Season Coasters by Sharon Holland

One of my most popular free projects has been these Apple Season Coasters. I couldn’t resist remaking them for the Spirited Look Book because the prints and colors of this collection are so yummy and perfect for the holidays. Stitching up a set of coasters as a hostess or teacher gift is a quick project for you gift giving list.

Spirited table scape by Sharon Holland

Spirited table scape by Sharon Holland

Christmas and get togethers are just around the corner. I’m basically ready but this weekend will be full-on baking and house cleaning. I’ll leave you with just a few pretty pictures of my house and decorations.

I don’t go all out and in fact this is the first time in I think 7 years that I pulled out the tree to decorate. I do more of a winter garden theme and do love the extra light and joy it brings to the house on the shortest daylight hours of the year.

Tree 2019 2.jpg

Wishing you all the best for 2020!

Sharon Holland Woodland Tree.jpg

I am an Amazon Associate site and earn from qualifying purchases on the products I’ve linked below. The helpful products selected are the same or similar to materials used to make the project(s) in this blog post. Thank you!

Chenille Pillows

Chenille Pillows

Chenille pillows by Sharon Holland

Chenille pillows by Sharon Holland

It’s been a pretty intense couple of weeks here as I’ve been sewing and photographing for the Spirited Look Book coming out December 2, 2019. The Art Gallery Fabrics Look Books are a virtual magazine of inspiring projects made with fabrics from the newest collections. I’ve got about one more day to wrap everything up and take a little breather so this seemed like a good time to share my Chenille Pillow project with you before Thanksgiving week rolls around. Who knows, you may be looking for a quick decorating project to spruce things up before the holidays.

Extra Edited Chenille Pillows-2web.jpg

This is one of those projects that looks super high-end and difficult but is SO easy! I guarantee once you add chenille to a project you’ll want to chenille everything—the texture it adds is amazing and the application is as simple as doing a straight stitch on your sewing machine.

Here’s How to Make Chenille Pillows

Gather your supplies to make two pillows:

  • 5/8 yard SPT-85229 Trail Marker Range print fabric from Art Gallery Fabrics Spirited

  • 5/8 yard DEN-L-4000 Soft Sand Linen blend from Art Gallery Fabrics

  • Two rolls 3/8’’ -wide Chenille-It in Natural

  • Off-white thread (to match chenille)

  • Two 22’’ squares of cotton batting

  • Two 16” invisible zippers to coordinate with print or linen

  • Two 18’’ pillow forms (I used feather pillow inserts)

  • Spray baste

Chenille-It Blooming Bias

Chenille-It Blooming Bias

When I designed my Trail Marker print for Spirited I envisioned embellishing this print with embroidery or some sort of extra details to enhance the geometric-global design.

First I experimented with embroidery but wasn’t in love with the results and it was very time consuming. Then I tried needle punch embroidery but because of the tight weave of Art Gallery Fabrics cotton it was a big fail. I really wanted to see my vision come to life and remembered the wonderful Chenille-It product I used when sewing for my Signature collection Look Book. See the pillow tutorial made with Signature fabric and Chenille-It HERE.

Chenille-It is a blooming bias tape that gave me EXACTLY the look I wanted and is incredibly fast and easy to apply.

Chenille Pillows construction web-4.jpg

Chenille the Pillow Tops

  • Cut two 21’’ squares from the printed fabric. These will become the fronts for two pillows. Layer in this order: 22’’ square batting and 21’’ print square right side up. Spray baste according to the manufacturer’s instructions.

  • Working in one diagonal direction at a time and starting near the center of the layered fabric, apply the chenille by stitching down the center of the blooming bias tape, sewing through both fabric and batting layers. There’s no need to pin the bias tape down, I just eye-balled the diagonal line as I sewed. Trim bias to edge of fabric then start a new row parallel to the first.

Chenille Pillows construction web-2.jpg
  • Continue adding parallel bias strips that run in the same diagonal direction.

  • Repeat to attach blooming bias to the diagonal lines running in the opposite direction by crossing the tape right over the previously applied diagonal lines.

Chenille Pillows construction web-1.jpg
  • Once all the chenille bias tape has been sewn to the foundation, follow the instructions on the package to “bloom” the chenille. I lightly wet the stitched pillow top under the faucet to get it damp-wet and vigorously rubbed the chenille with my hand to fluff it before tossing into the dryer with some damp towels to bloom and fluff further by tumbling. In the photo above, the pillow top on the right has been fluffed lightly. I ended up fluffing it more when I bloomed the second top on the right that hadn’t been bloomed yet.

  • Carefully press the dried, bloomed pillow tops. Trim and square to 19’’.

Assemble Pillows

  • Cut two 19’’ linen squares for the pillow backs.

  • Referring to my Hidden Zipper tutorial, to finish the pillows using the 19’’ linen squares and 16’’ invisible zippers. Again, a hidden zipper sounds super intimidating but you’ll be amazed how easy this technique is and your pillows will have a professional, high-end look when finished.

Chenille pillows by Sharon Holland

Chenille pillows by Sharon Holland

 
Extra Edited Chenille Pillows-5web.jpg

Be watching for the Spirited Look Book coming the first week of December and find more inspirational sewing projects for your home and family.

Have a happy Thanksgiving!

Spirited fabrics by Sharon Holland

Spirited fabrics by Sharon Holland