

There’s a new quilt pattern in the SHOP and she’s called, Granny Plaid. This confident-beginner, retro-inspired, strip-set-based quilt pattern, comes with 6 quilt size options and goes together fast!

For the cover quilt, I chose the Full/Queen size quilt from the pattern and mixed three of my Art Gallery Fabrics collections to get this non-traditional color palette for a patriotic summer quilt or it could even be a non-traditional Christmas quilt in these colors. The AGF collections I pulled from are: Tumbleweed, Heirloom, and Kindred. The backing used for the cover quilt is the 108’’ wide back from my Tumbleweed collection. The 2.5 Edition binding is also from Tumbleweed.
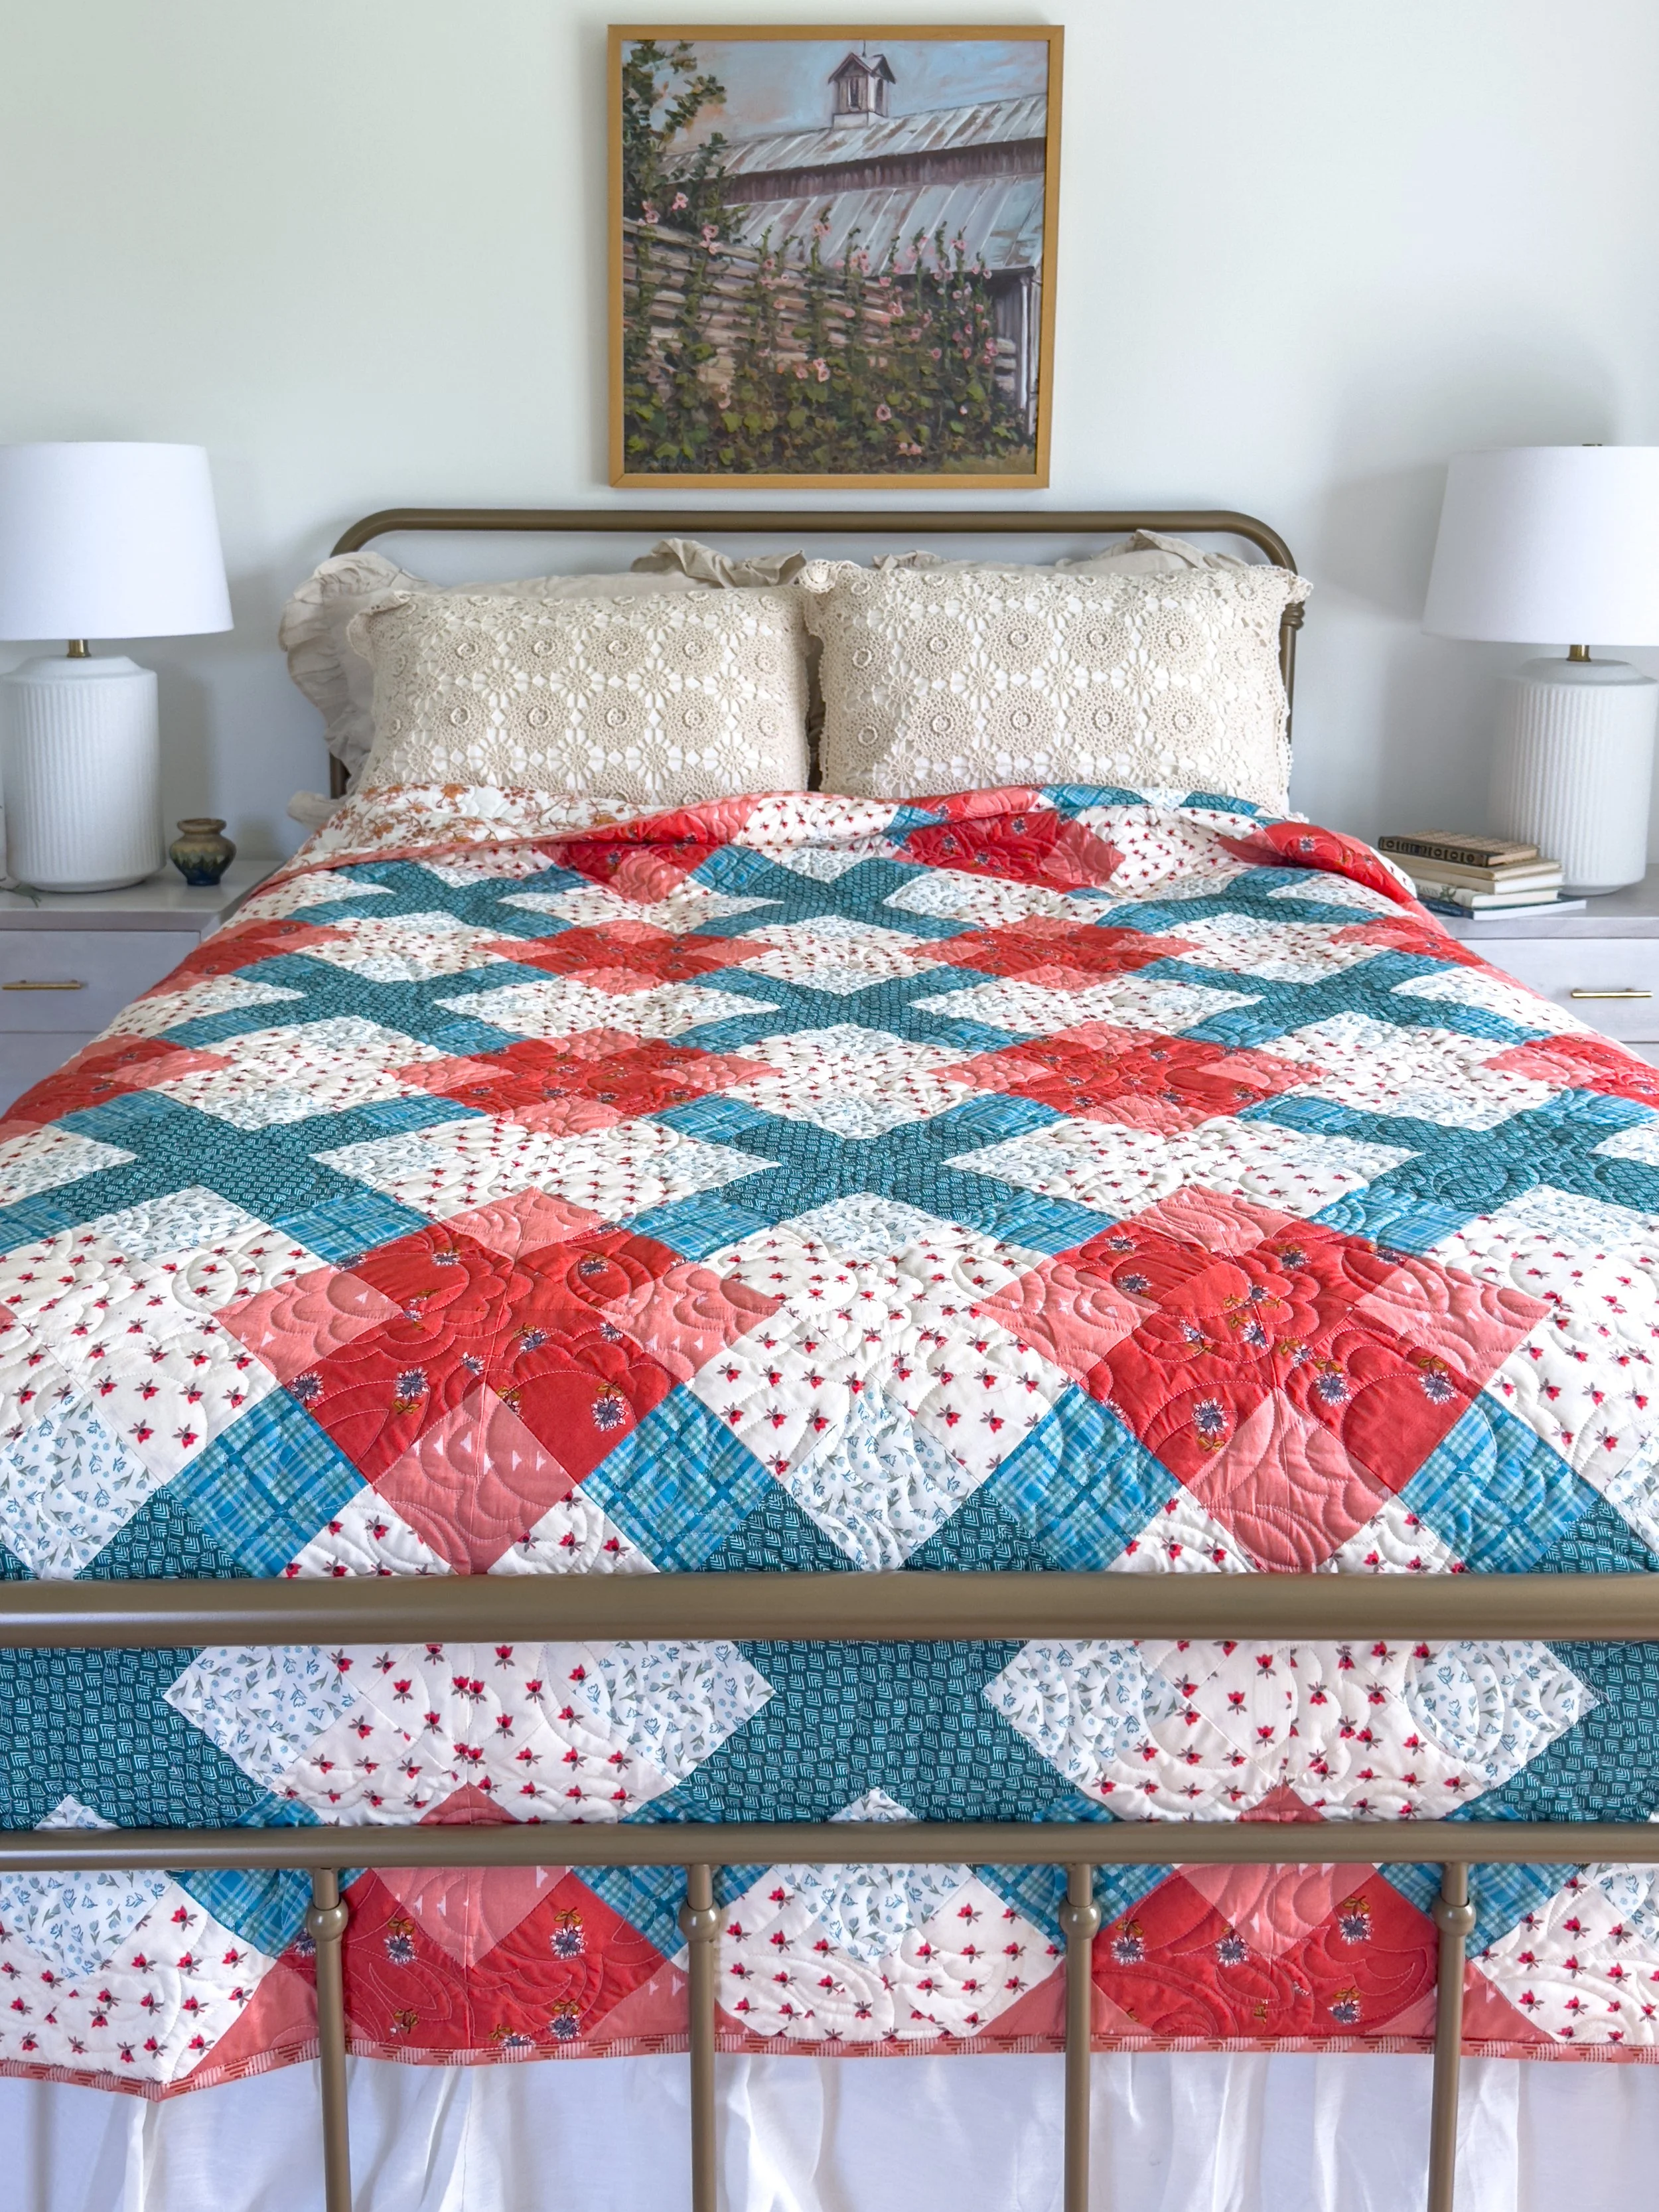
Depending upon fabric placement, this pattern has infinite possible looks and an on-point diagonal plaid design emerges once the blocks are joined. Don’t let the word Granny in the pattern name fool you, this gal is more modern in her style and is a bold and fresh look in today’s interiors!

Purchase the new Granny Plaid pattern from my SHOP.

The quilting for both the cover quilt and the throw quilt I made were done by Brooke Becker of Lady Belle Fabric. The cover quilt has Hobbs Batting Heirloom 80/20 Cotton/Poly blend batting inside for a more traditional weight.

My niece is moving into a new house and since I wanted to make a second Granny Plaid quilt anyway I decided to make her a Granny Plaid throw quilt as a house-warming gift. She’s using a lot of green in her new place, loves books, and her husband is a hunter so even though this quilt is really for my niece, I did want to include elements for the entire family.
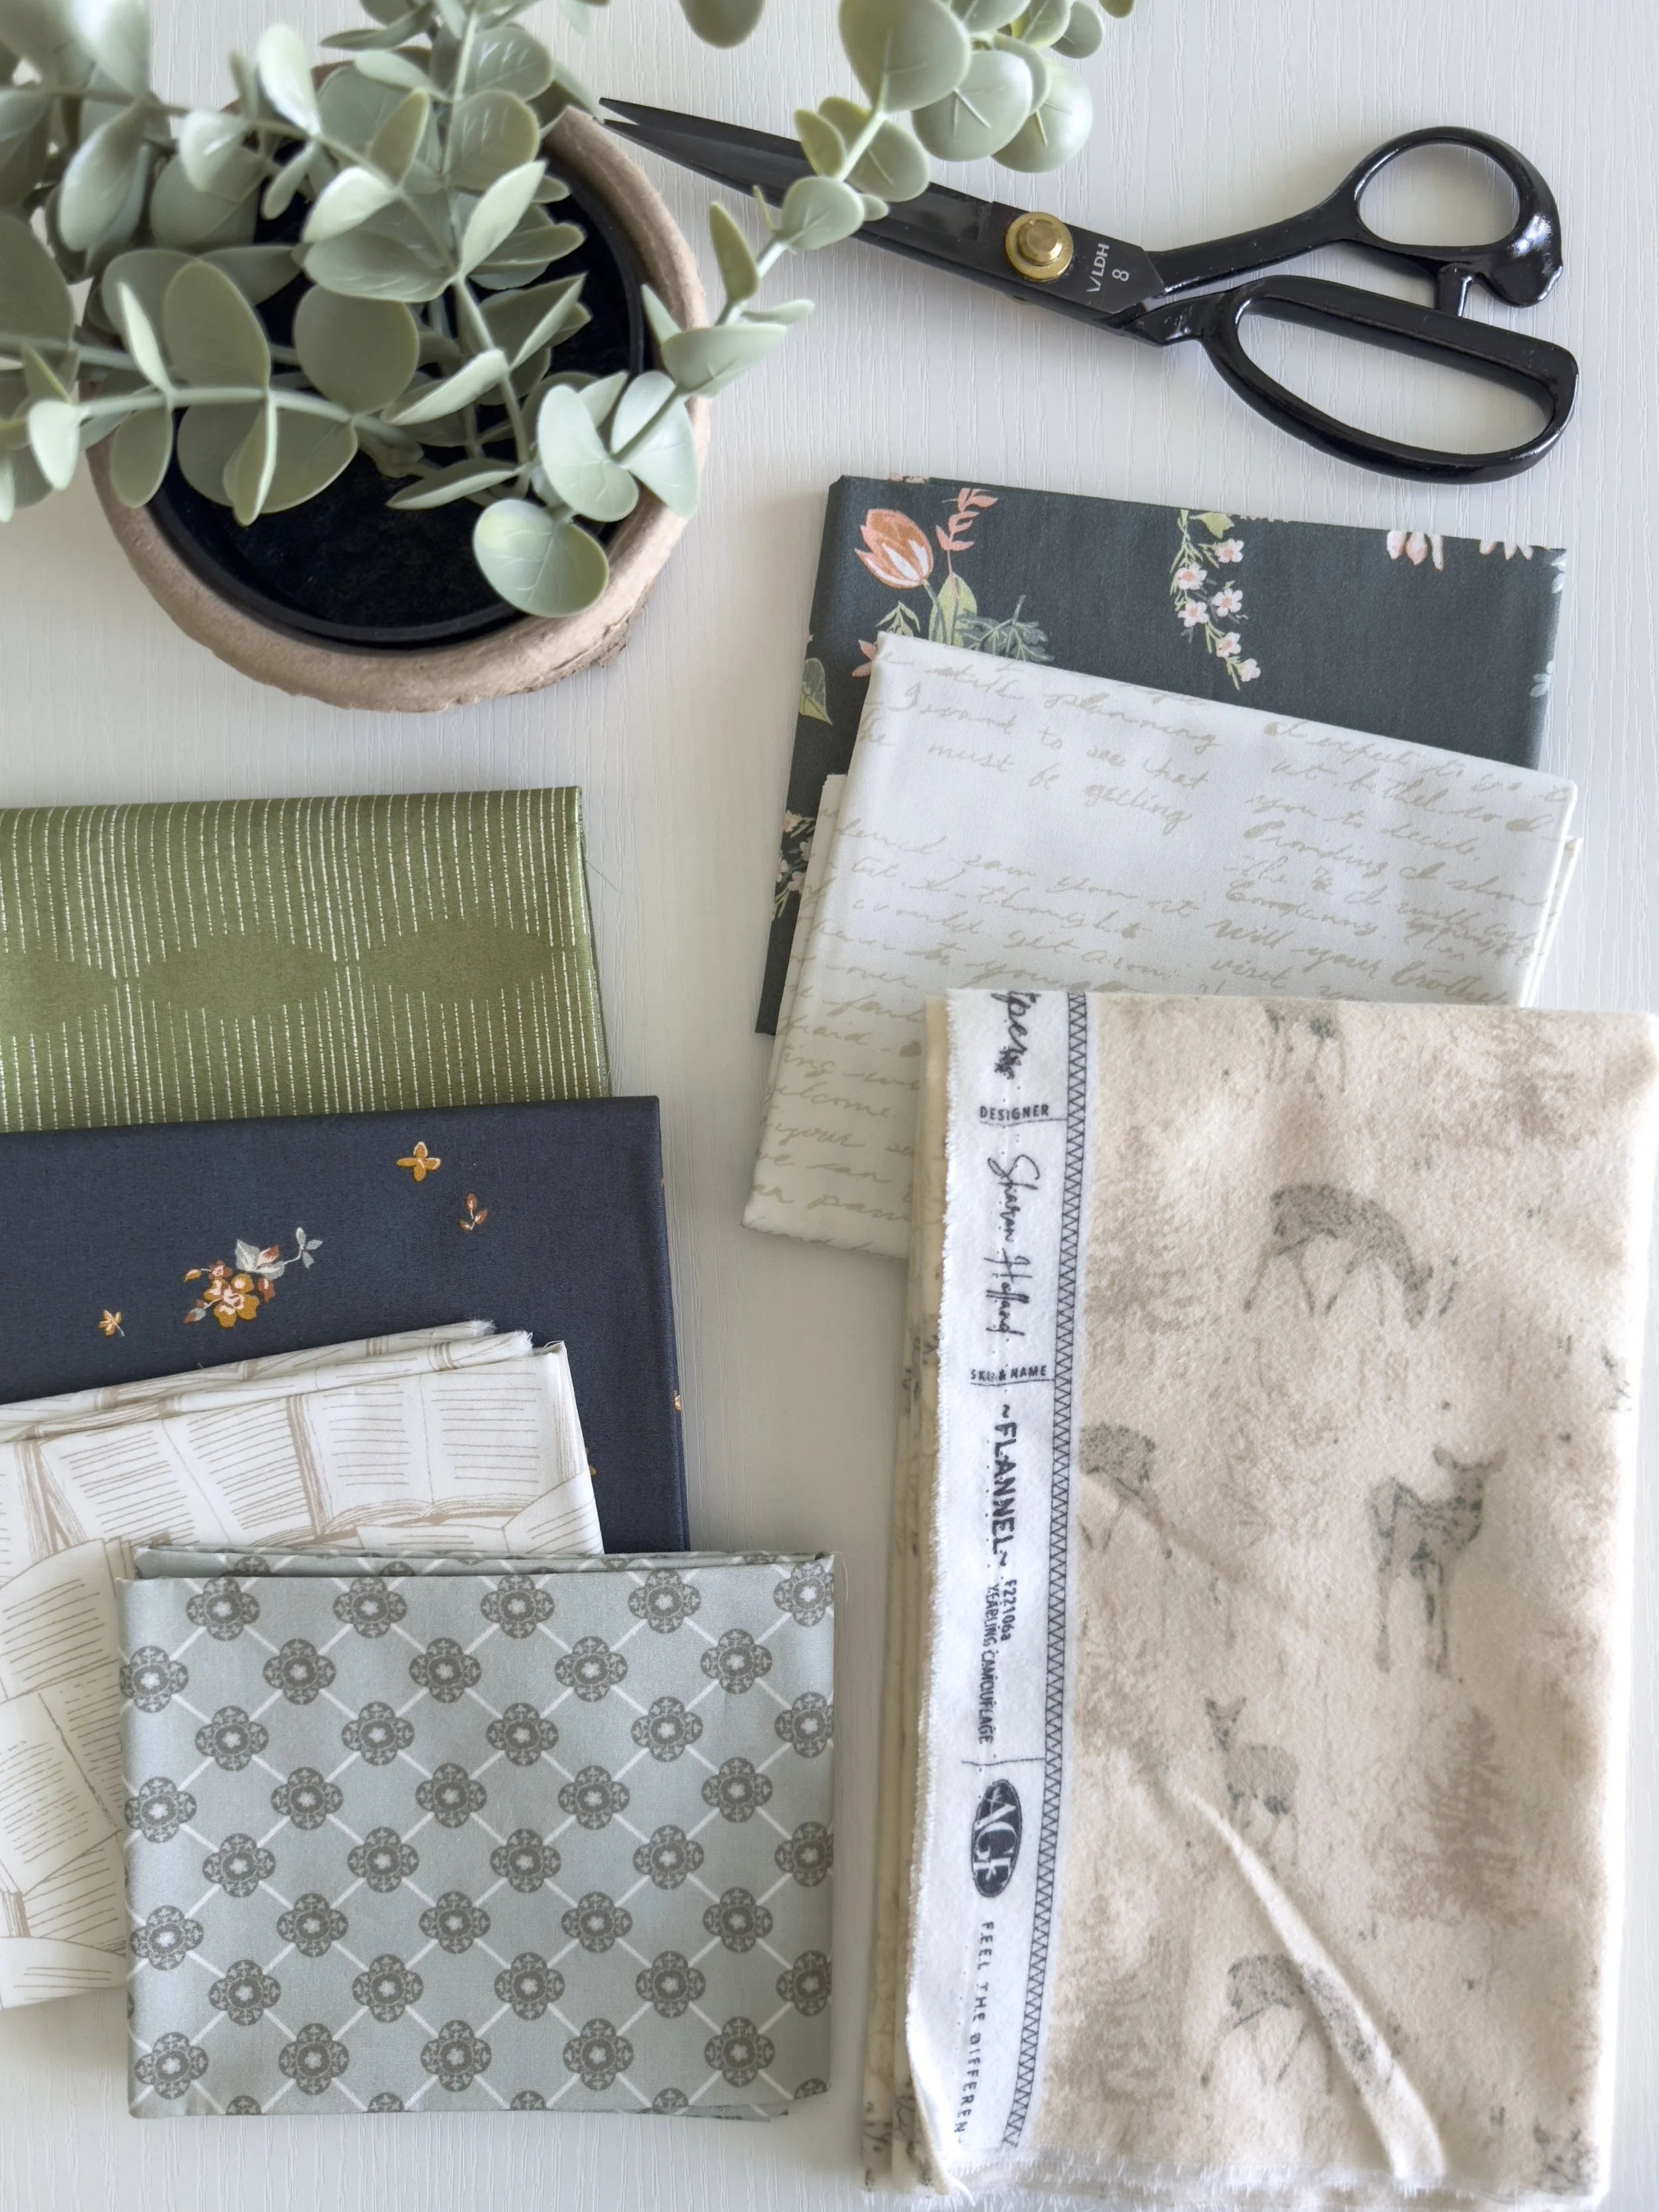
Here again, I pulled my fabrics from across several of my Art Gallery Fabrics collections to curate the perfect look for this throw quilt and its recipients. Fabrics are from the following AGF collections:
Potager, Juniper, Heirloom for the binding (not shown above), Willow, Shine On, and Bookish
The backing is the double-brushed, cozy flannel Yearling print from the Juniper collection. I’m calling this green and black version the ‘Green Gables’ version and love the lattice look that feelings you’ve stepped into a garden.

If you like this throw quilt look and want to make one for yourself, you won’t have to go through the work of sourcing the different prints because Victoria Newmyer of Midlife Quilter has kits for this Green Gables version of the Granny Plaid throw! Get your quilt kit while supplies last at Midlife Quilter (backing sold separately).

For the batting on this throw quilt, I used Hobbs Batting Tuscany Cotton Wool batting for a luxurious heft and extra warmth. The quilting was done by Brooke Becker of Lady Belle Fabric and compliments my nieces modern style.

This quilt will work for any time of year and green, like plants are the perfect neutral and work with just about any decor style.

MEET THE TESTERS
A Sharon Holland Designs pattern release would not be complete without a Testers Parade of Quilts! I’m so lucky to have talented makers and designers testing my patterns and they always blow me away with their creativity, sewing skills, color and fabric selections, and their love and excitement for quilting. I highly encourage you to follow these talented makers on their social platforms and see more of what they create when they’re not testing quilt patterns for me.

Quilt made by Michelle Corless
Michelle Corless
Michelle Corless is our newest team member and made a gorgeous Granny Plaid throw quilt in her signature, outdoor-inspired palette. Michelle used a mix of Art Gallery Fabrics Pure Solids, AGF Decostitch, and prints from my Potager collection that capture spring time in the mountains in a quilt. If you’re on Instagram, follow Michelle @compassandwildflower to see more of her beautiful quilts or learn more about her from her blog Compass and Wildflower and check out her pattern shop!

Table runner made by Melissa David
MELISSA DAVID
Melissa David of Quilting Above the Clouds on Instagram. Melissa made this romantic Granny Plaid table runner for her great niece that was just married last month. The Art Gallery Fabrics used in Melissa’s runner are pulled from an assortment of AGF collections and designer. The long arm quilting on the runner was done by Melissa, herself and beautifully enhances the romantic quality!

Quilt made by Amanda Bagin
Amanda Bagin
I’ve always had a thing for a madder brown and bubblegum pink color combination so it was such a joy to see Amanda Bagin’s crib quilt in those colors! It’s so modern and vintage all rolled up in one sweet quilt. Amanda used all Art Gallery Fabrics and here’s the breakdown:
-AGF pure solids in Mink, Cinnamon, and Golden Bronze, and AGF Botanist collection by Katarina Roccella in Wild Meadow Blush, Festooned Quartz, and Ethereal Sky Light
-Backing in AGF White Linen
-Binding in AGF Mink
See more of Amanda Bagin work @quiltsbycritter on Instagram and on her Etsy shop,

Table runner made by Joyce Ulm
JOYCE ULM
Joyce Ulm used prints from the new Tangerine collection by AGF Studio for Art Gallery Fabrics to make this country-fresh Granny Plaid table runner. Joyce’s work is always perfection and she does the long arm quilting on her quilts—always picking the perfect pantograph design. You can see more of Joyce’s work on Instagram @evamaescustomquilts, Etsy shop, and on her Facebook blog HERE, and takes custom orders for long arm quilting.

Quilt made by Tracey Taber-Perry
TRACEY TABER-PERRY
Great minds DO think alike! Tracey made her Granny Plaid throw quilt in Maureen Cracknell’s brand new Marigold collection for Art Gallery Fabrics and envisioned this fun plaid quilt as a picnic quilt. When I first designed this quilt I was originally going to call it the Picnic quilt but thought maybe that was boxing it in as only a summertime make so I changed the name to Granny Plaid. I love that Tracey felt this would be cute for a picnic and I especially love the retro-vibe prints and colors she used. This talented maker can be found on Instagram, HERE @ttabes80 to see more of her beautiful makes.

Table runner made by Marija Vujcic
MARIJA VUJCIC
Marija Vujcic pulled an eclectic mix Art Gallery Fabric prints from assorted fabric collections in her stash to make this beautiful table runner. Hothouse colors of summer create a look that’s ready to entertain! Brighten up your table with a fun and playful Granny Plaid table runner just like this one by Marija. Learn more about how Marija free motion quilted her runner and other quilting tutorials by visiting her at Marija Vujcic on Instagram @maraquiltdesigns and on her blog at Mara Quilt Designs.

Granny Plaid quilt kit
Get the Granny Plaid ‘Green Gables’ throw quilt kit at Midlife Quilter while supplies last!
Are you inspired to make a Granny Plaid quilt? Be sure to tag me on Instagram if you post quilts or projects made from my patterns—I love seeing what you create!
Be sure to stop by this blog over the next couple months because there’ll be a new fabric collection by me called Midsummer coming in June, new quilt patterns, and a fun pillowcase pattern to incorporate the Crochet-Edge Blanket technique I taught in the Crochet-Edge Blanket Workshop on my Sew Along page. If you aren’t already getting them, be sure you sign up to receive my newsletters that announce a new blog post or events!
Following me on Instagram as well will mean you’ll never miss a thing! When you follow me on Instagram there’s a daily dose of Sharon Holland Designs on my Instagram account @sharonhollanddesigns and it’ll keep you up to date on new pattern releases, new fabric collections, and more!