

Hello! It’s been awhile since I’ve made a blog post but that doesn’t mean I haven’t been busy—in fact, I’ve been really busy and over the next few weeks you’ll get plenty of blog posts to prove it!
To kick off the new year, I’ve a new fabric collection with Art Gallery Fabrics called, Shine On. This collection was supposed to ship last December but with all the delays, it’s just in hitting the shops now. I’ve added a list of shops carrying Shine On to my Fabrics page to make it easier for you to add this collection to your stash.
I designed Shine On as an early spring collection and thought about how yellow crocuses poke out of the snow and the earth starts putting forth little hints of color from its winter slumber.
The golden yellow’s and peaches of this collection have been tonic on gloomy winter days—I’ve been thoroughly enjoying my sewing!

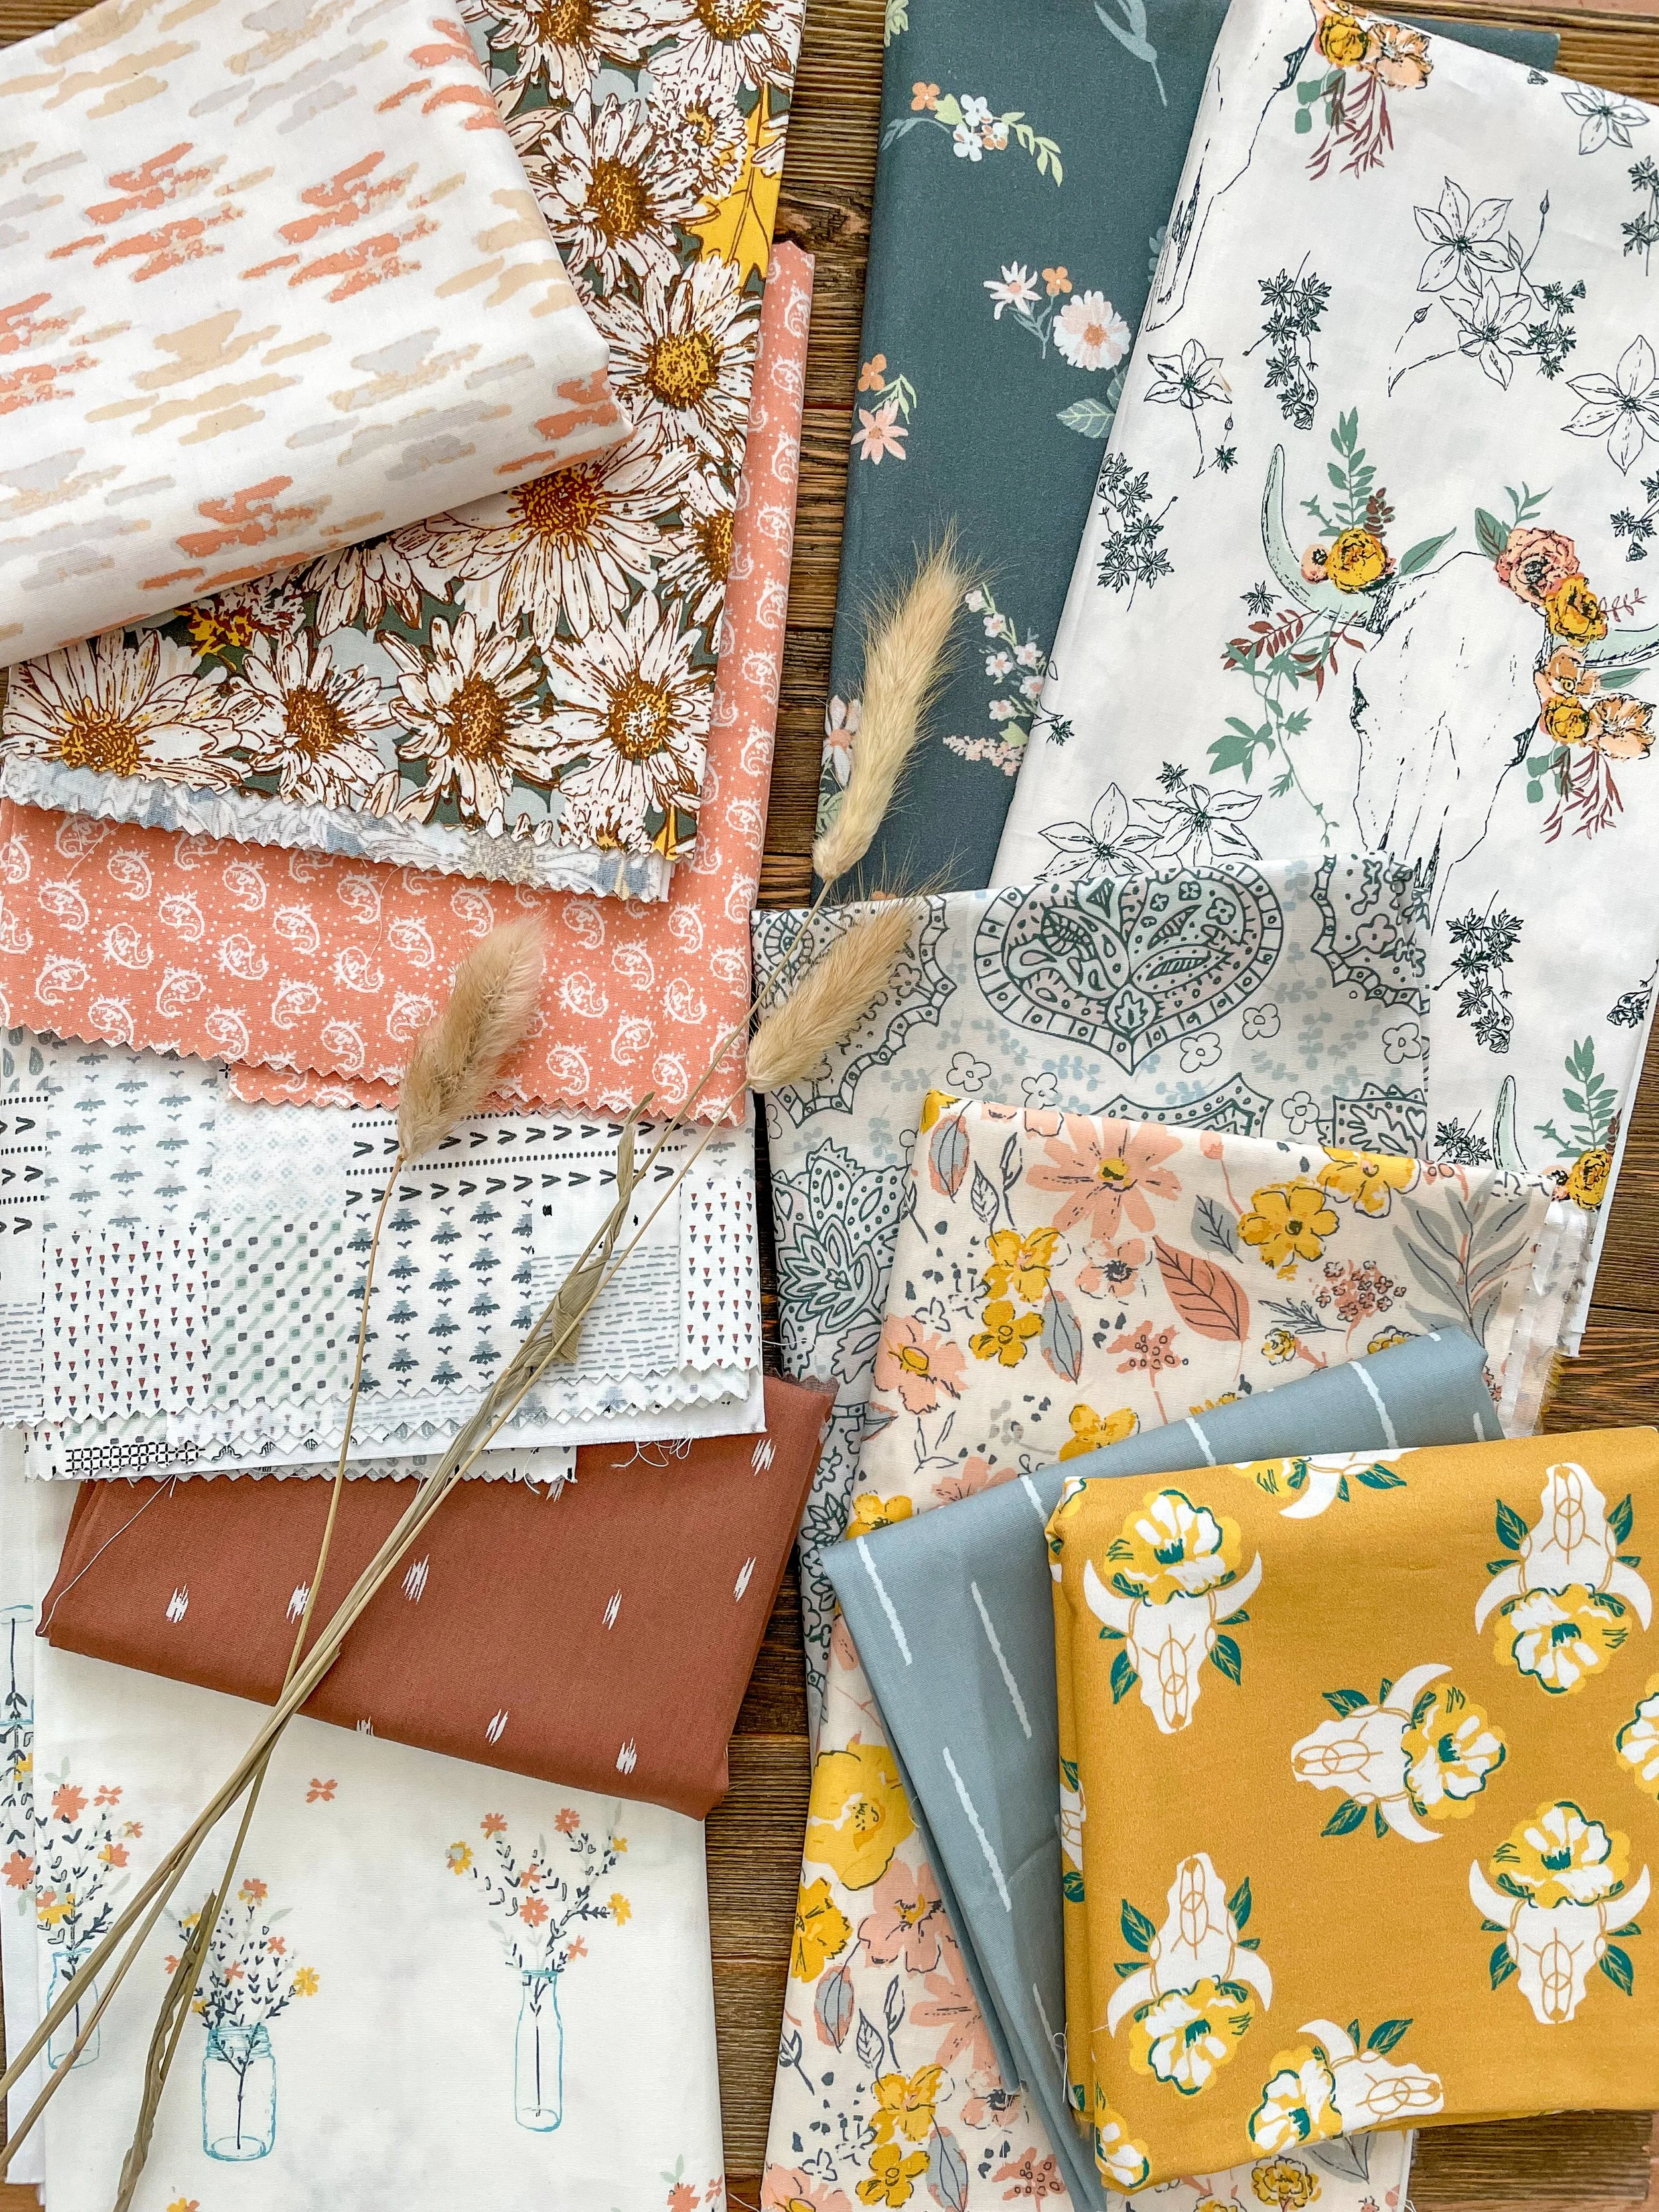
All 16 quilting cotton rolls for this collection fit into the canvas basket in my sewing room and it’s like pure sunshine seeing them as I work!

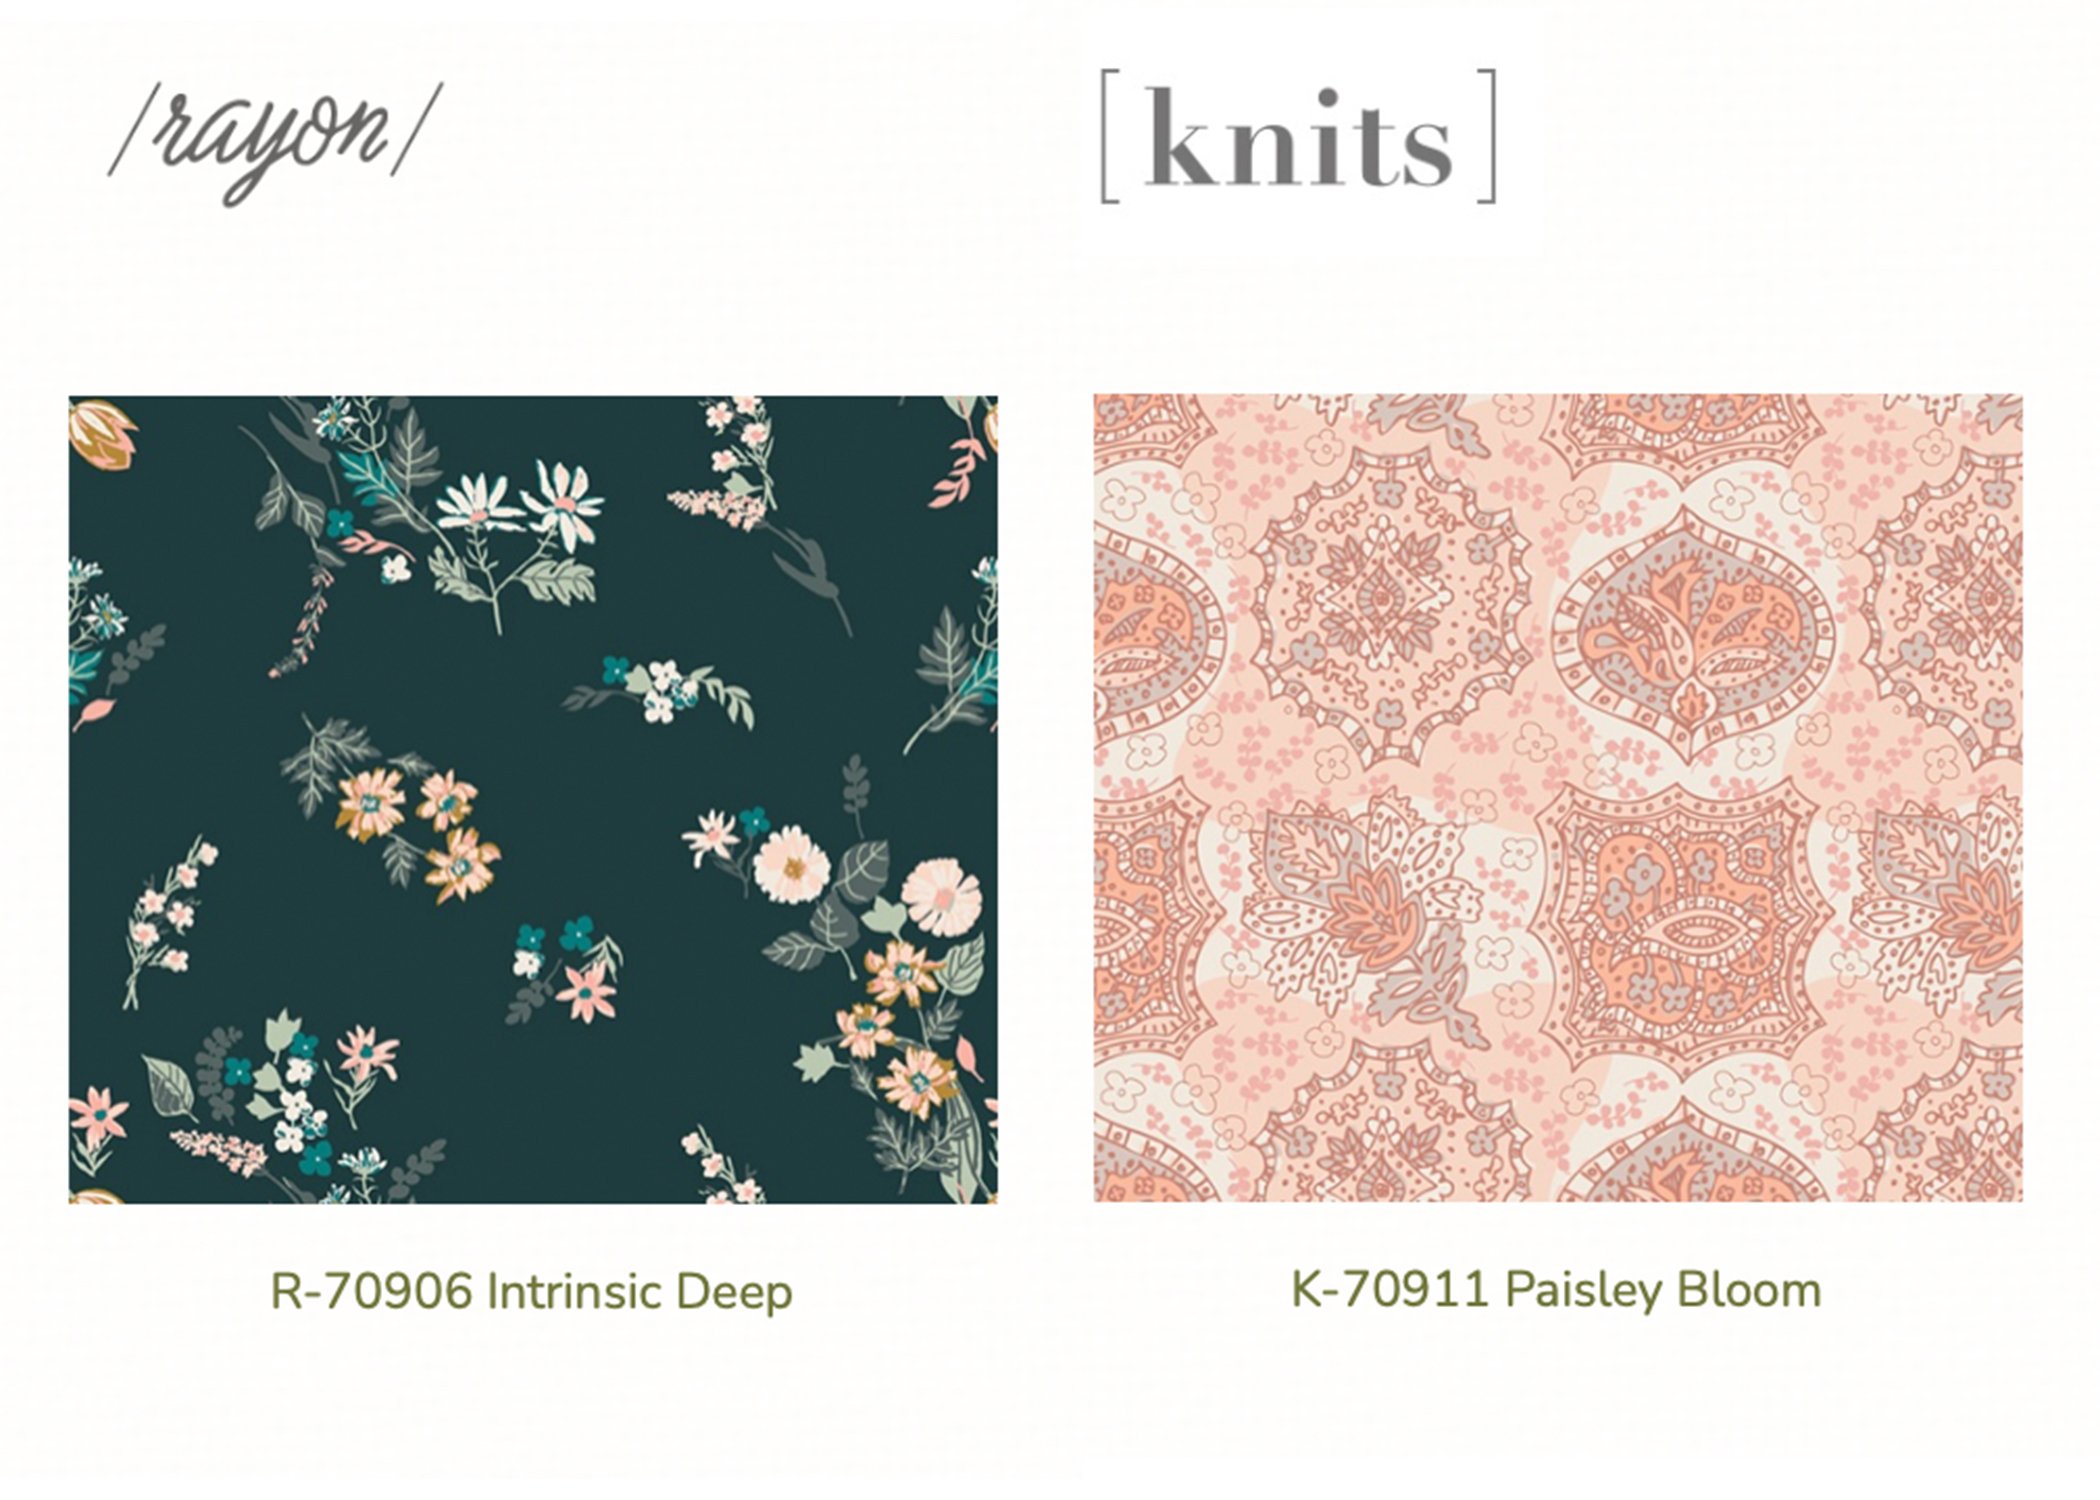
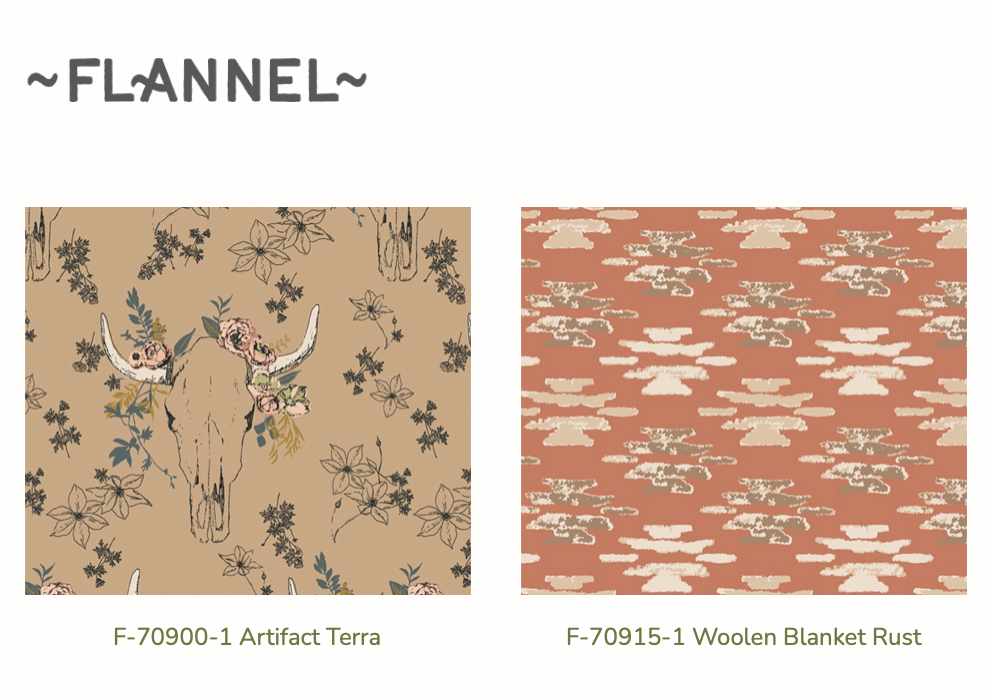
Here’s a look at all 16 quilting cotton prints for the Shine On collection. This collection also includes one rayon, one knit, and two flannel prints (see below).
New Pattern
With every new collection I like to have at least one new pattern. I just can’t help myself when it comes to a new fabric collection—I just want to make so many things and play with the fabrics!
Below is my fabric pull for my project. I decided to use my Venture print from the AGF Vert Fusions collection as the background and I love how this print looks with the new Shine On collection.

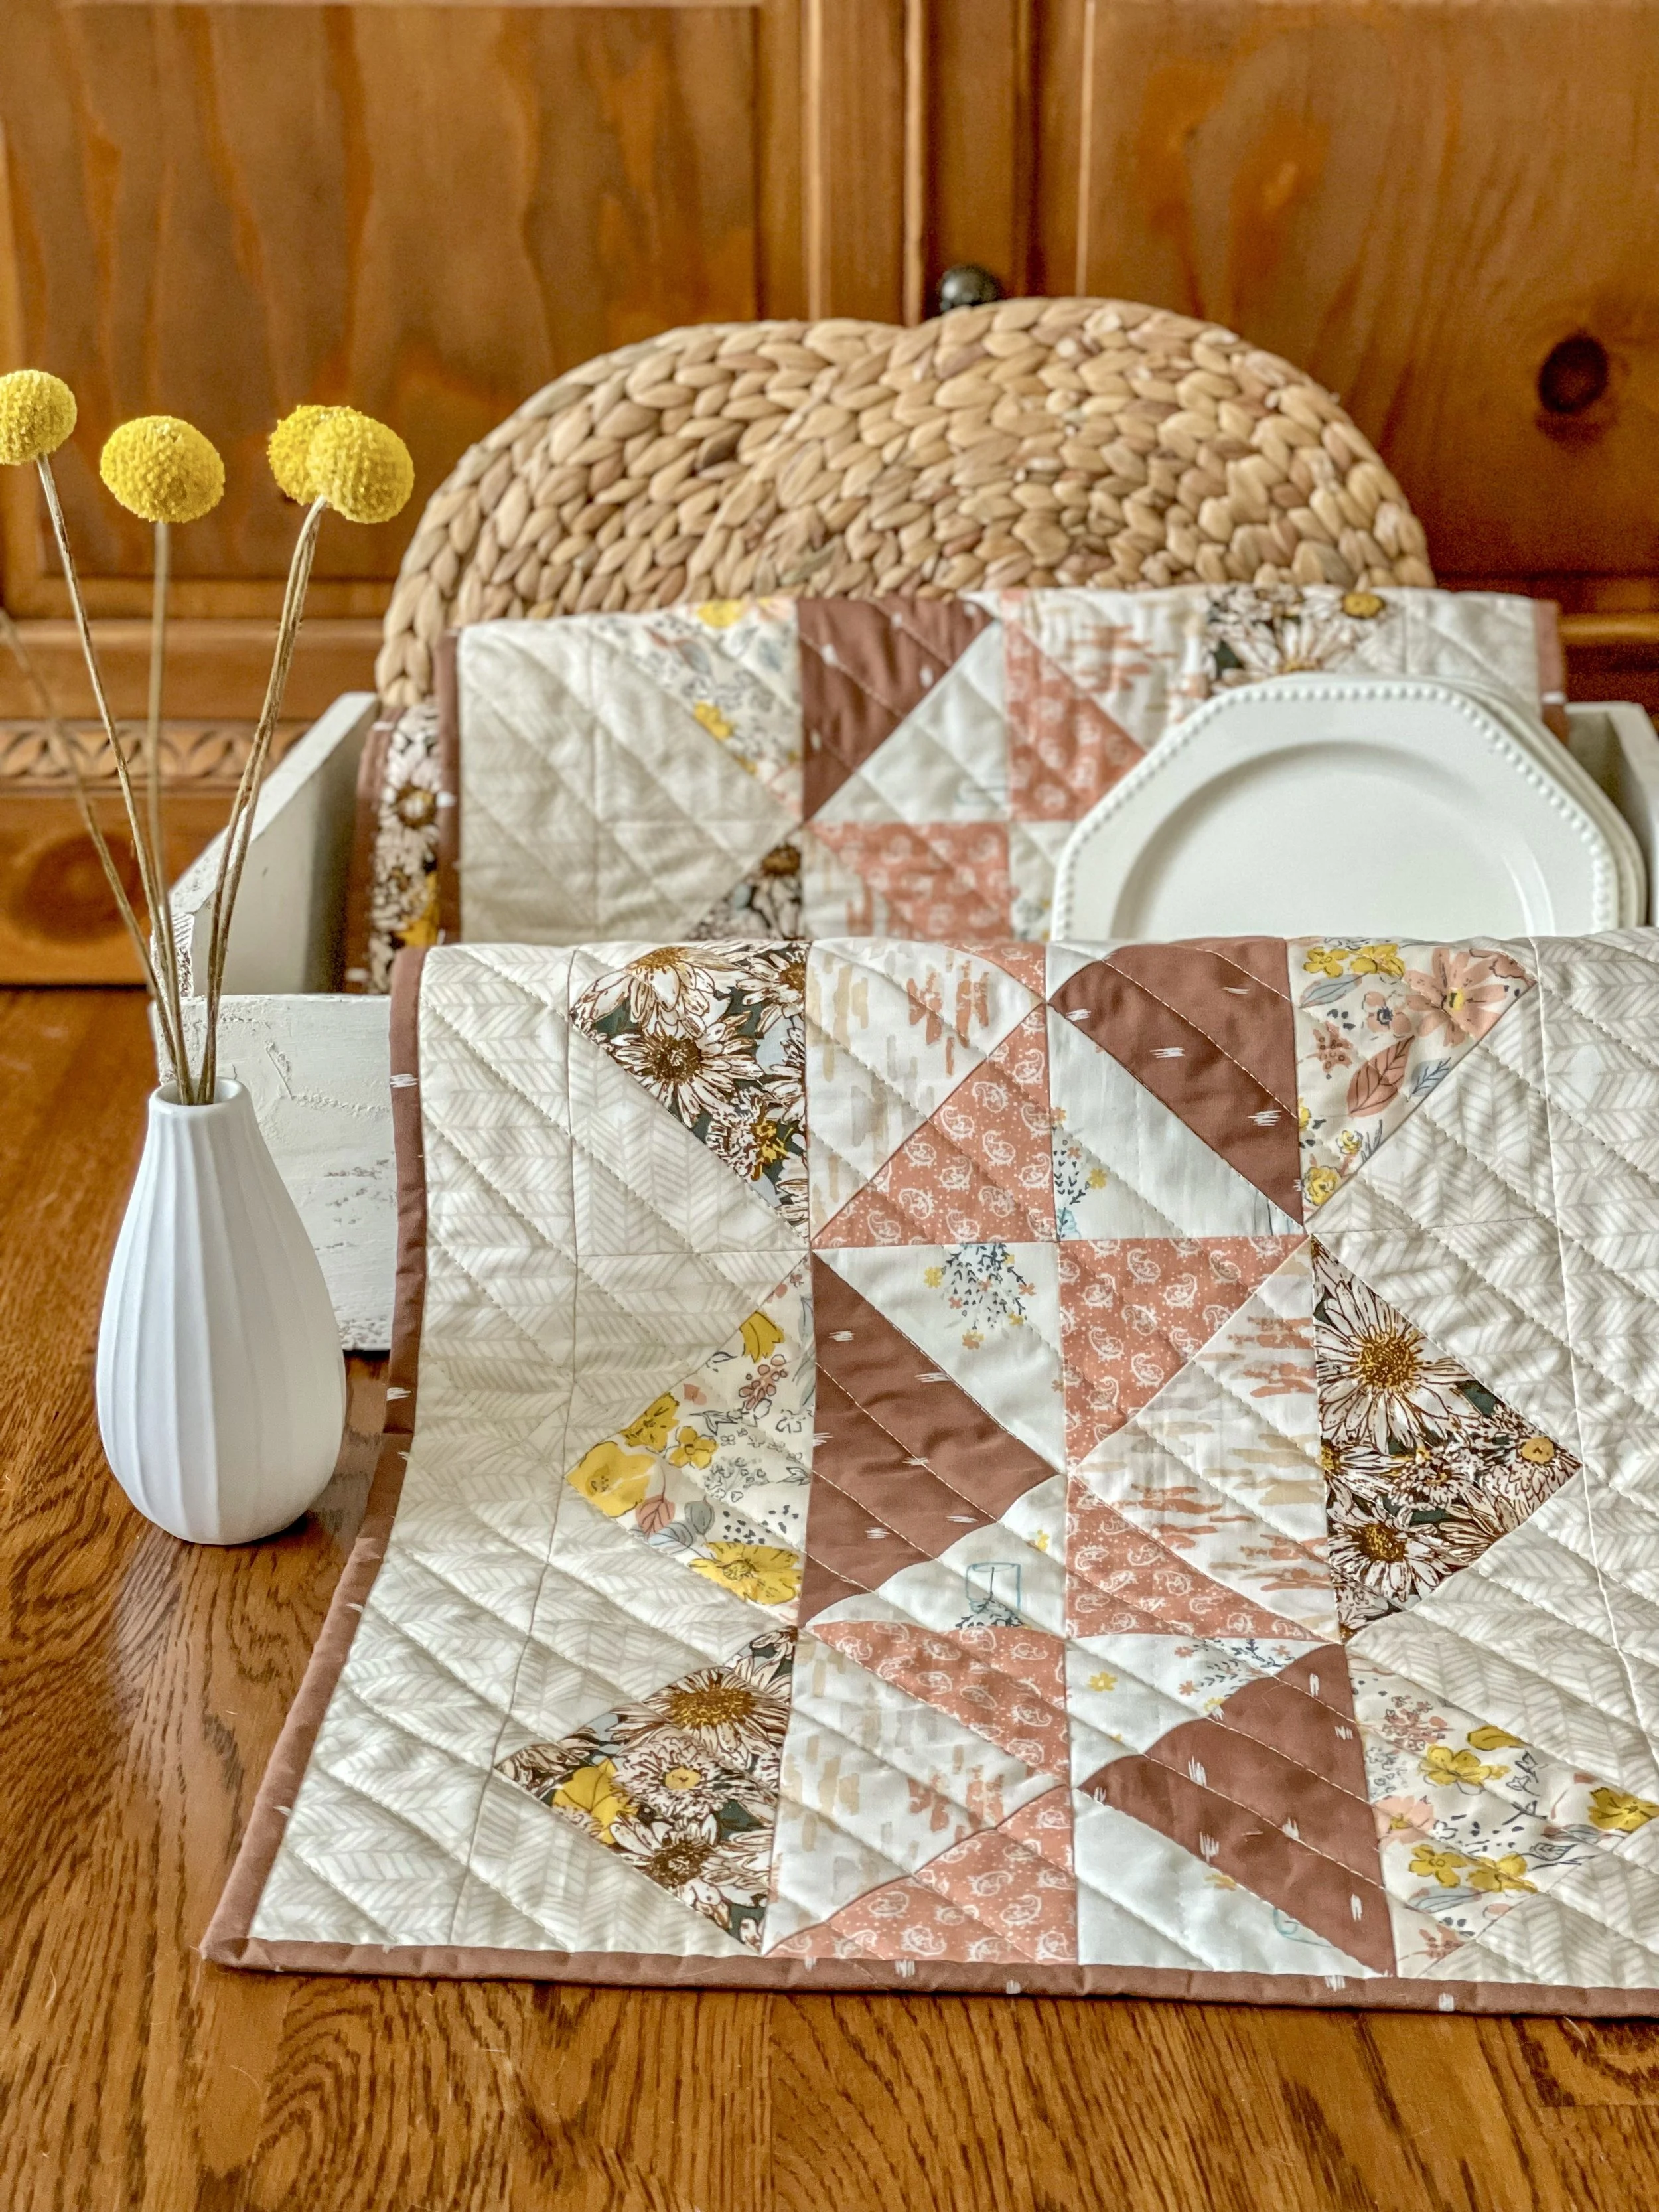
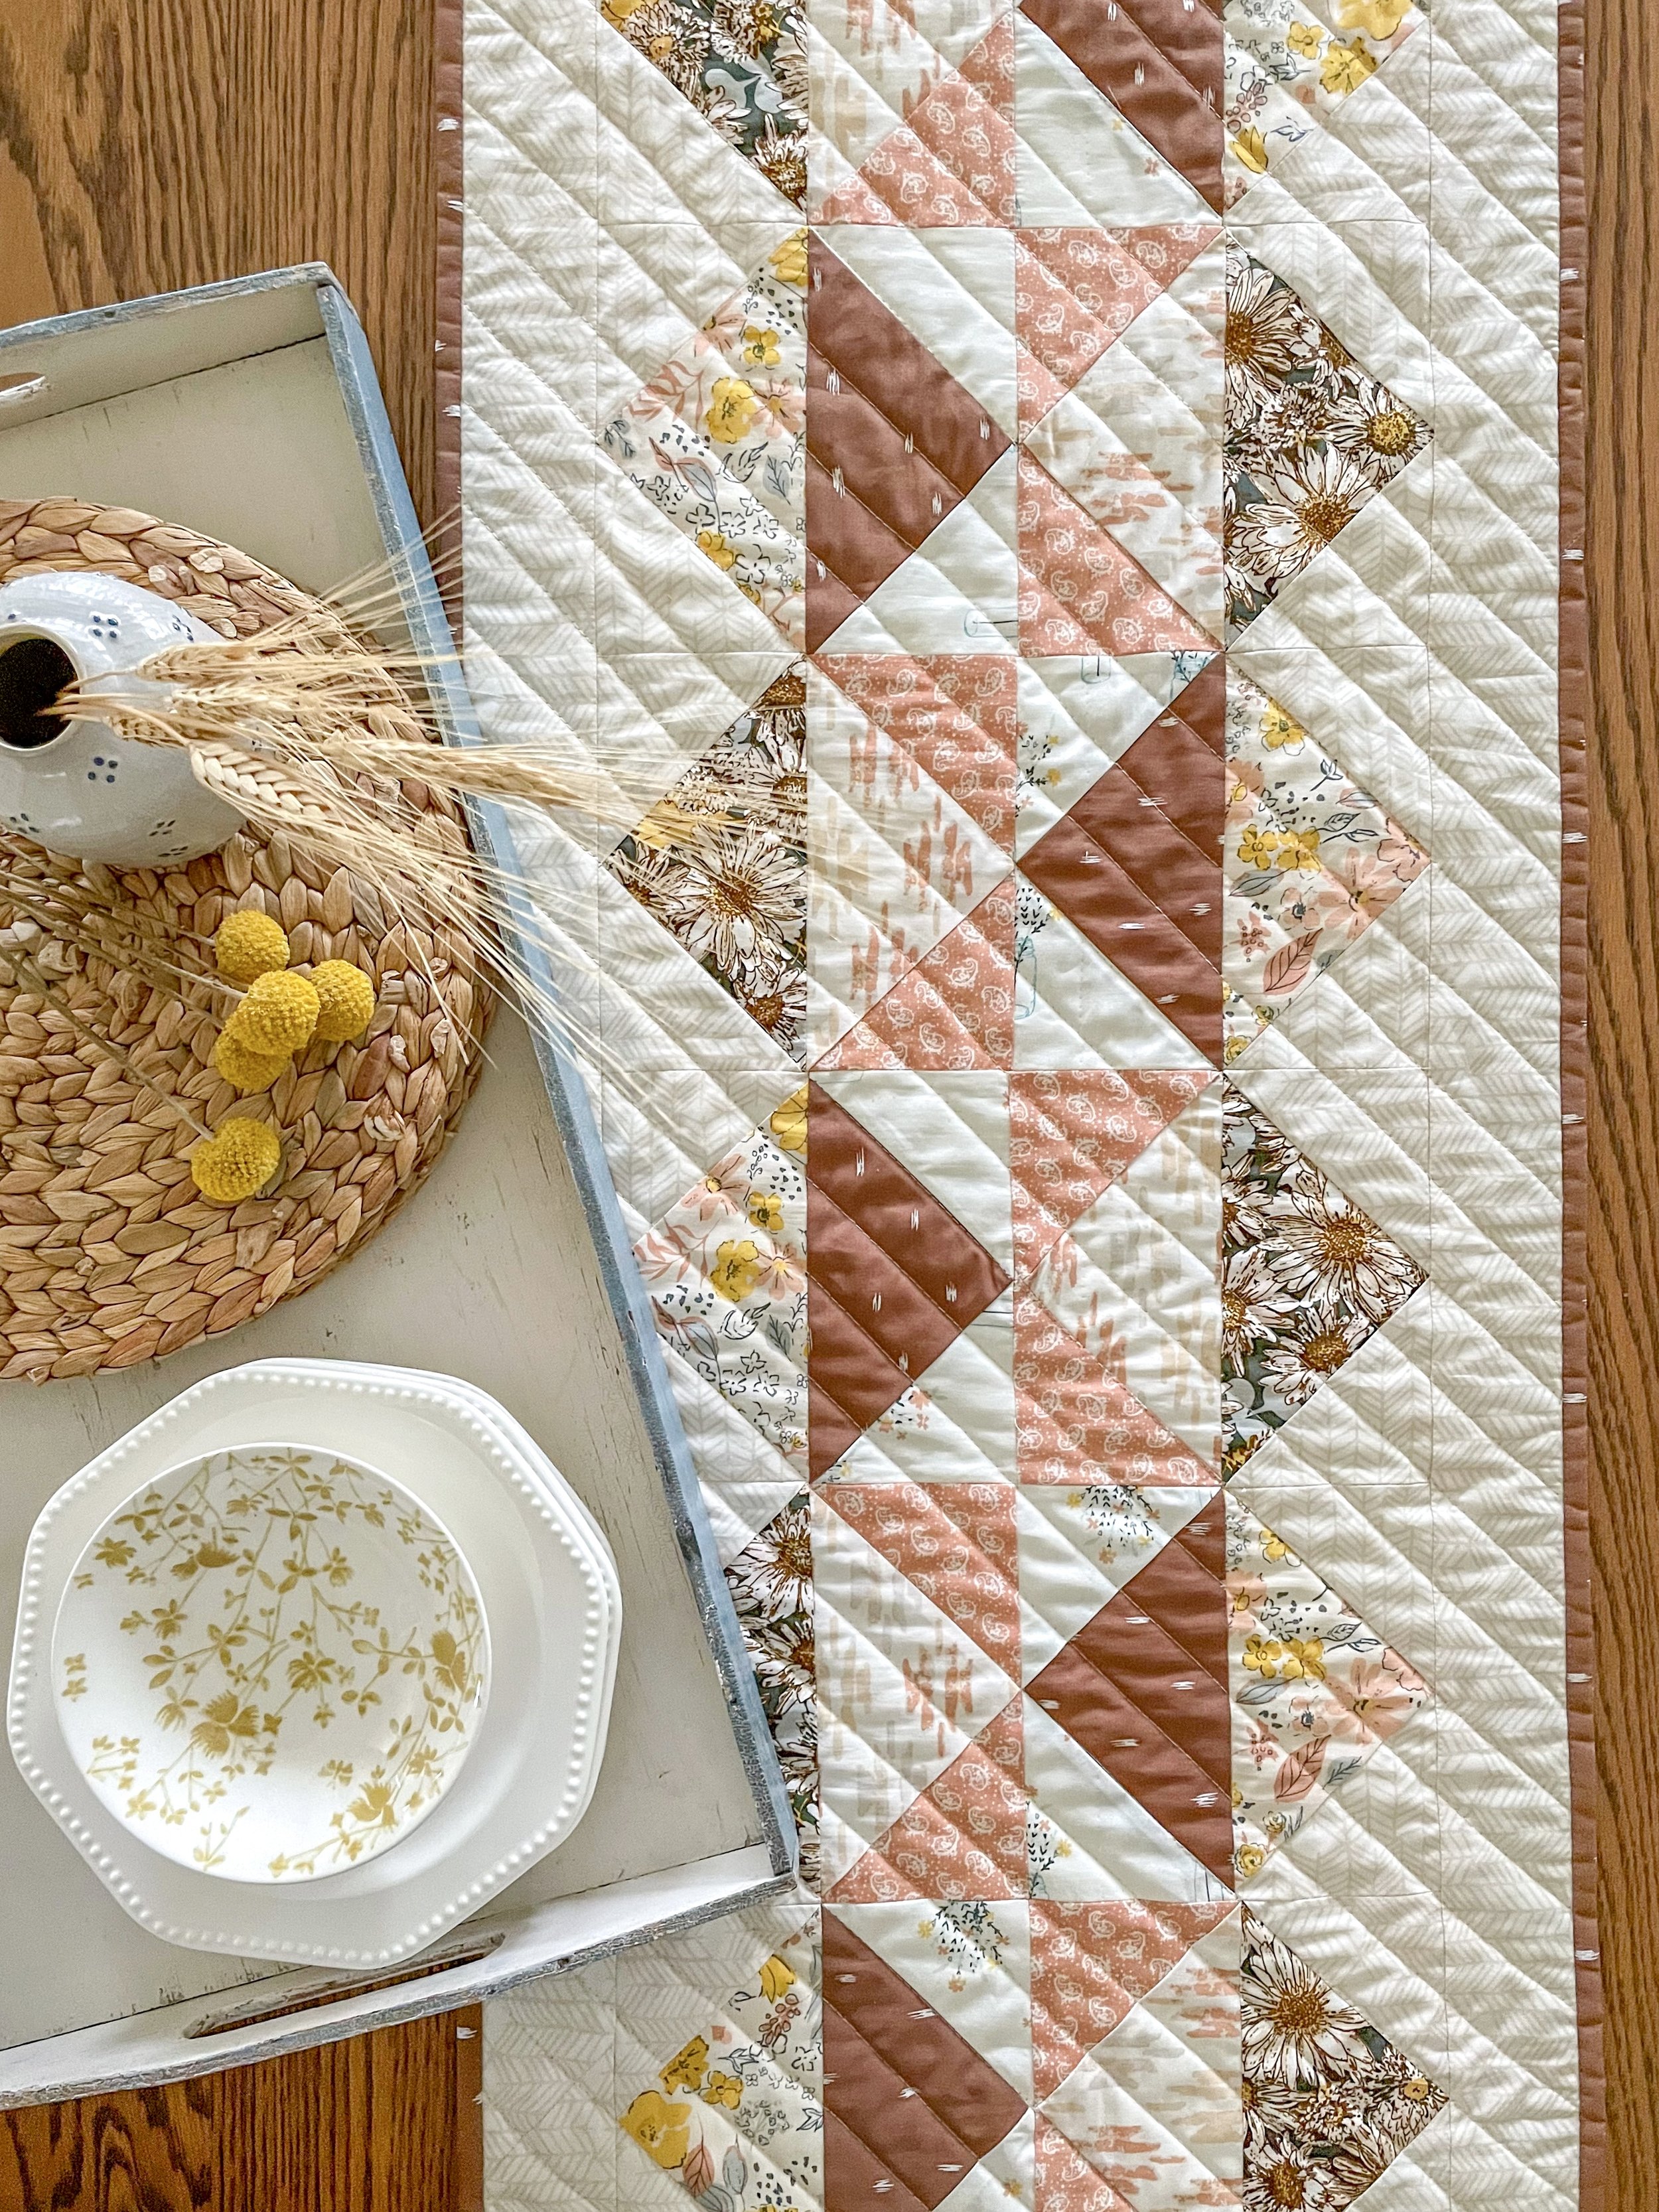
Switchback Trail Table Runner
I’ve really created a lot of patterns over the years and decided that some of the oldest patterns needed updating of instructions, techniques, and/or fabrics for the cover photo. Switchback Trail is one of those patterns that needed a refresh and I’m so glad I did because it’s my new favorite runner and now I have the perfect runner for my dining table.
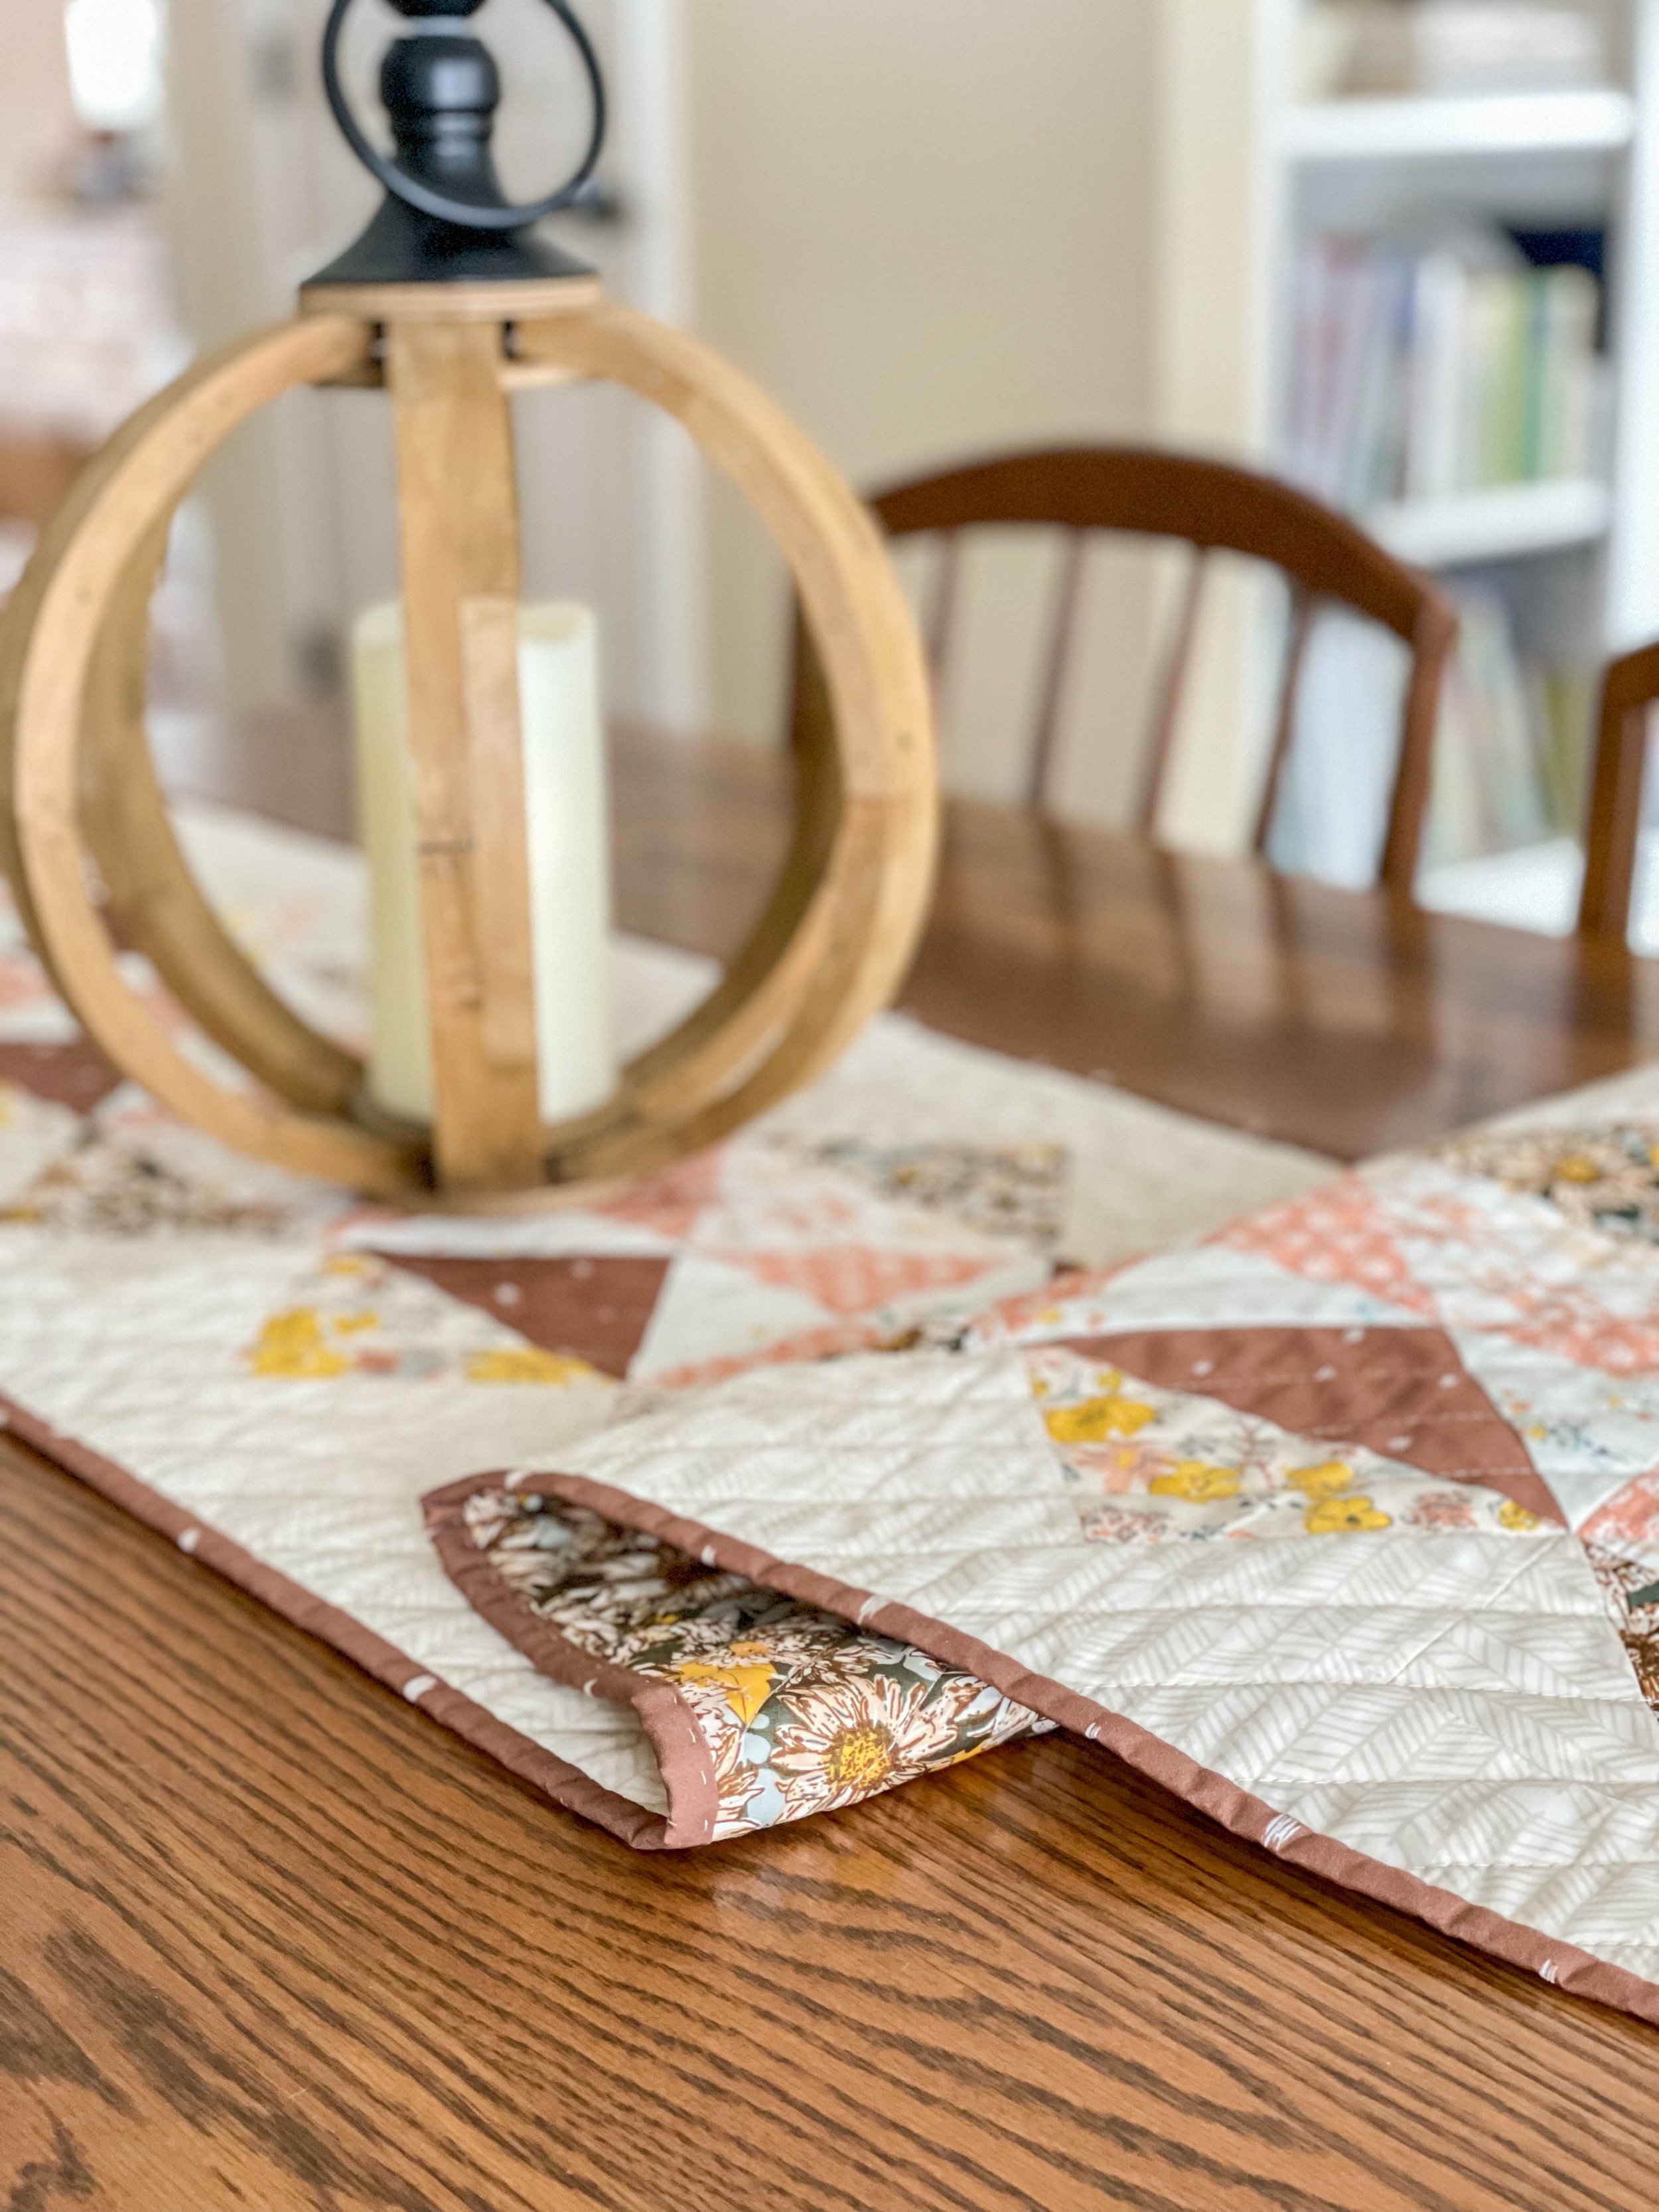
As part of the rewriting of this pattern I changed up the Flying Geese construction method to include the No-Waste Flying Geese technique and wow, does this project go together fast!

The units are purposely a little oversized to be trimmed exactly to size for perfect points. I used Bloc_Loc rulers to trim my geese but if you don’t have fancy rulers, you can trim Flying Geese (or half-square triangles) perfectly with your regular rulers. I’ve a tutorial all about how to trim these units, HERE.

This 72’’-long runner is a good size for most dining tables and makes a great decor statement with it’s modern design. I did a simple straight line diagonal stitching for quilting to add interest by not detract from the runner’s patchwork pattern. For the batting, I used Hobbs Tuscany Silk batting. The silk blend gives some stitch definition and resists creasing.

I can see this table runner staying on my table all the way up until next Christmas when I’d switch out for a holiday runner. This feels fresh now but will also work well for summer and fall—I have a lot of these tones in my home decor.
I know this blog has been quiet for a bit too long but over the next few weeks you’ll be getting emails (if subscribed) letting you know about the new postings and new projects! I’ve quite a bit to share, so see you back here soon!
Don’t forget that you can get daily doses of what I’m up to over on Instagram. Follow me @sharonhollanddesigns and keep up on all the latest fabric and projects news.
I am an Amazon Associate site and earn from qualifying purchases on the products I’ve linked below. The helpful products selected are the same or similar to materials used to make the project(s) in this blog post or related items I think you may enjoy.