Heart Quilt Sew Along - Week 3

Heart Quilt Sew Along - Week 3

Sharon Holland Heart Quilt Cozy SQ.jpg

It’s the final week in the Heart Quilt sew along. This fast and fun sew along has been hosted by myself and Maureen Cracknell with special thanks to Allison Harris of Cluck Cluck Sew for allowing us to use her Heart Block in our quilt layout.

If you’re just joining us, you’ll want to get up to speed by reading first weeks post announcing the sew along. If you’re already making heart block or at the point to start adding the sashing and borders—check out week 2 HERE.

This last post is dedicated to turning that top into a quilt plus I’ve added an extra bonus project for all those left over half square triangles from trimming the large flippy corners off the hearts!

Sharon Holland Heart Quilt Finished-5.jpg

Quilting

Rather than reinvent the wheel, I'm directing you to the blog post for Finishing that was originally posted during the Sewcial Bee Sampler sew along. You'll find all the tutorial information for spray basting, quilting, and binding your quilt. The sizes have changed but the concept for basting, quilting, and binding your quilt are the same. As stated in that post, there are many ways to finish a quilt and I am blogging about how I finish my quilts. If you have a preferred method, please do it the way you're comfortable with. If you intend to send your top off to be professionally quilted, discuss with your long-arm quilter how they'd like you to prepare your quilt top and backing for being quilted. 

IMG_6074.jpeg

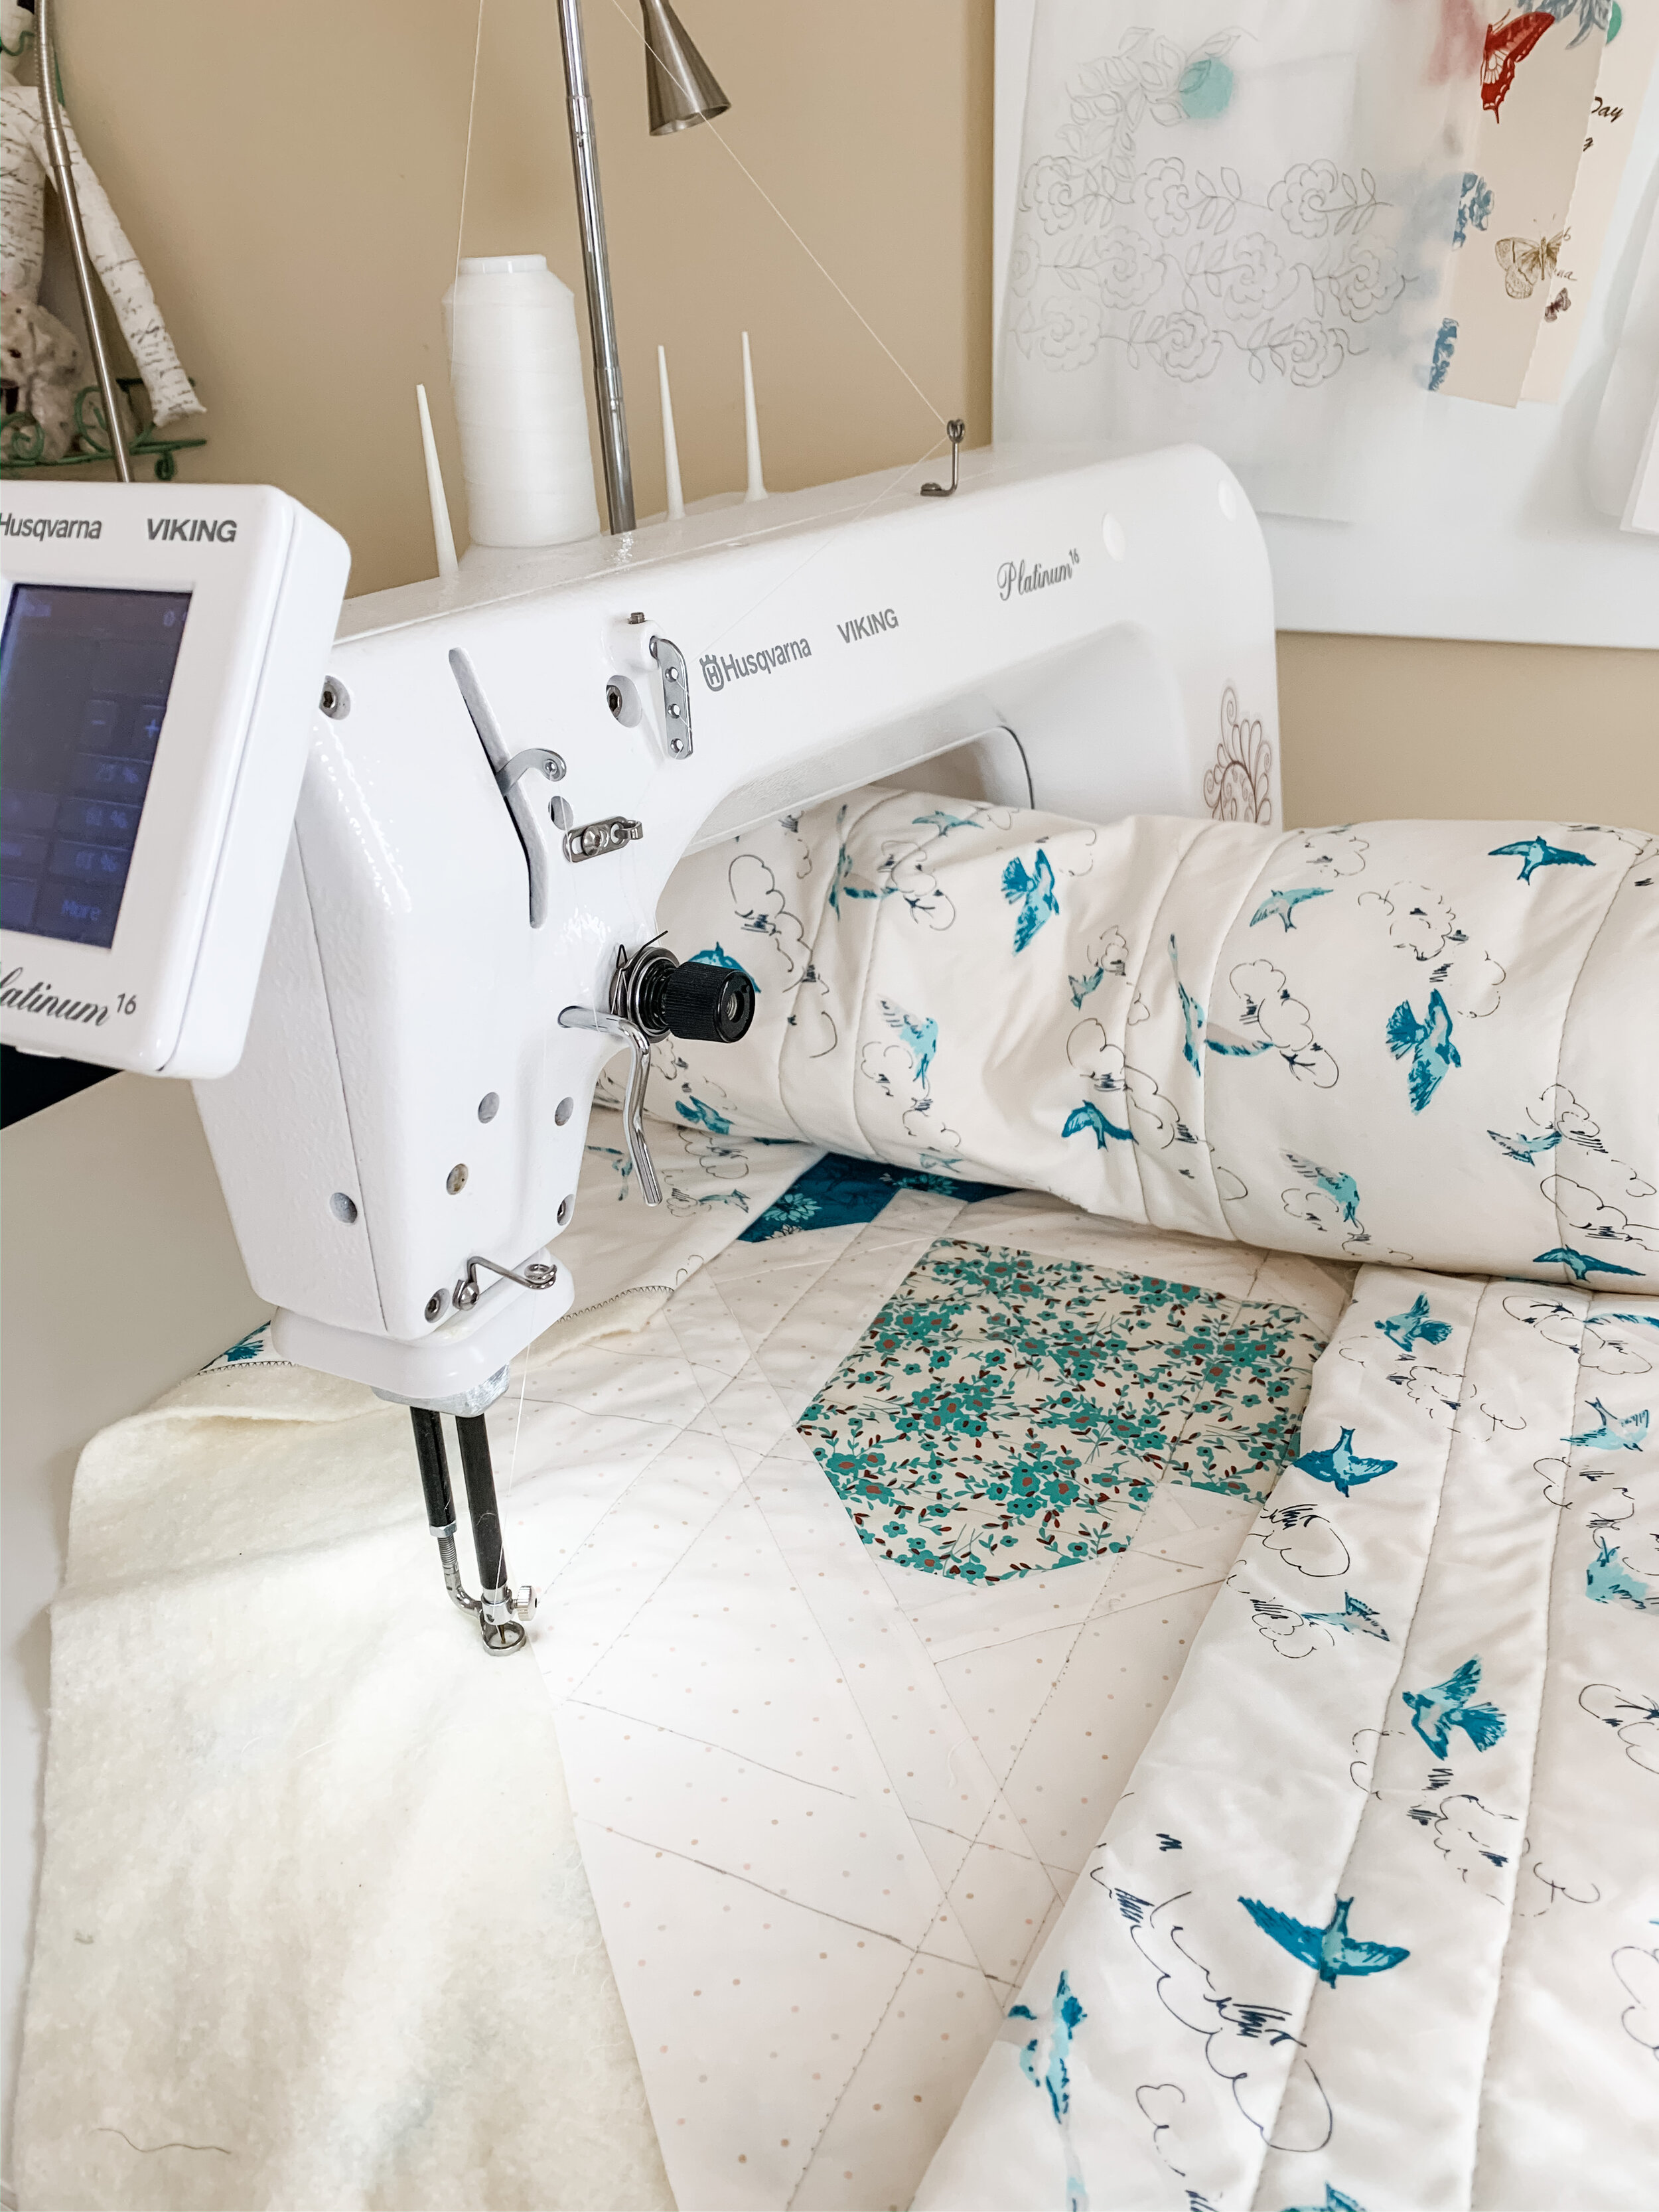
I'm not a professional quilter by any means. I get by and call my quilting style "organic" because it's not perfect and lines are not straight. I love the human touch that non-perfect quilting adds to my quilts. I used my mid-arm Viking Platinum 16 for quilting my top. The quilting guide lines were marked out ahead of time and the quilting went really fast after that to just follow the diagonal lines as shown below in the quilting diagram.

Quilting diagram

Quilting diagram

I used my favorite Hobb’s Tuscany Silk batting inside my quilt and love how light and drapey it is—especially for handling and maneuvering when quilting.

IMG_6137.jpeg

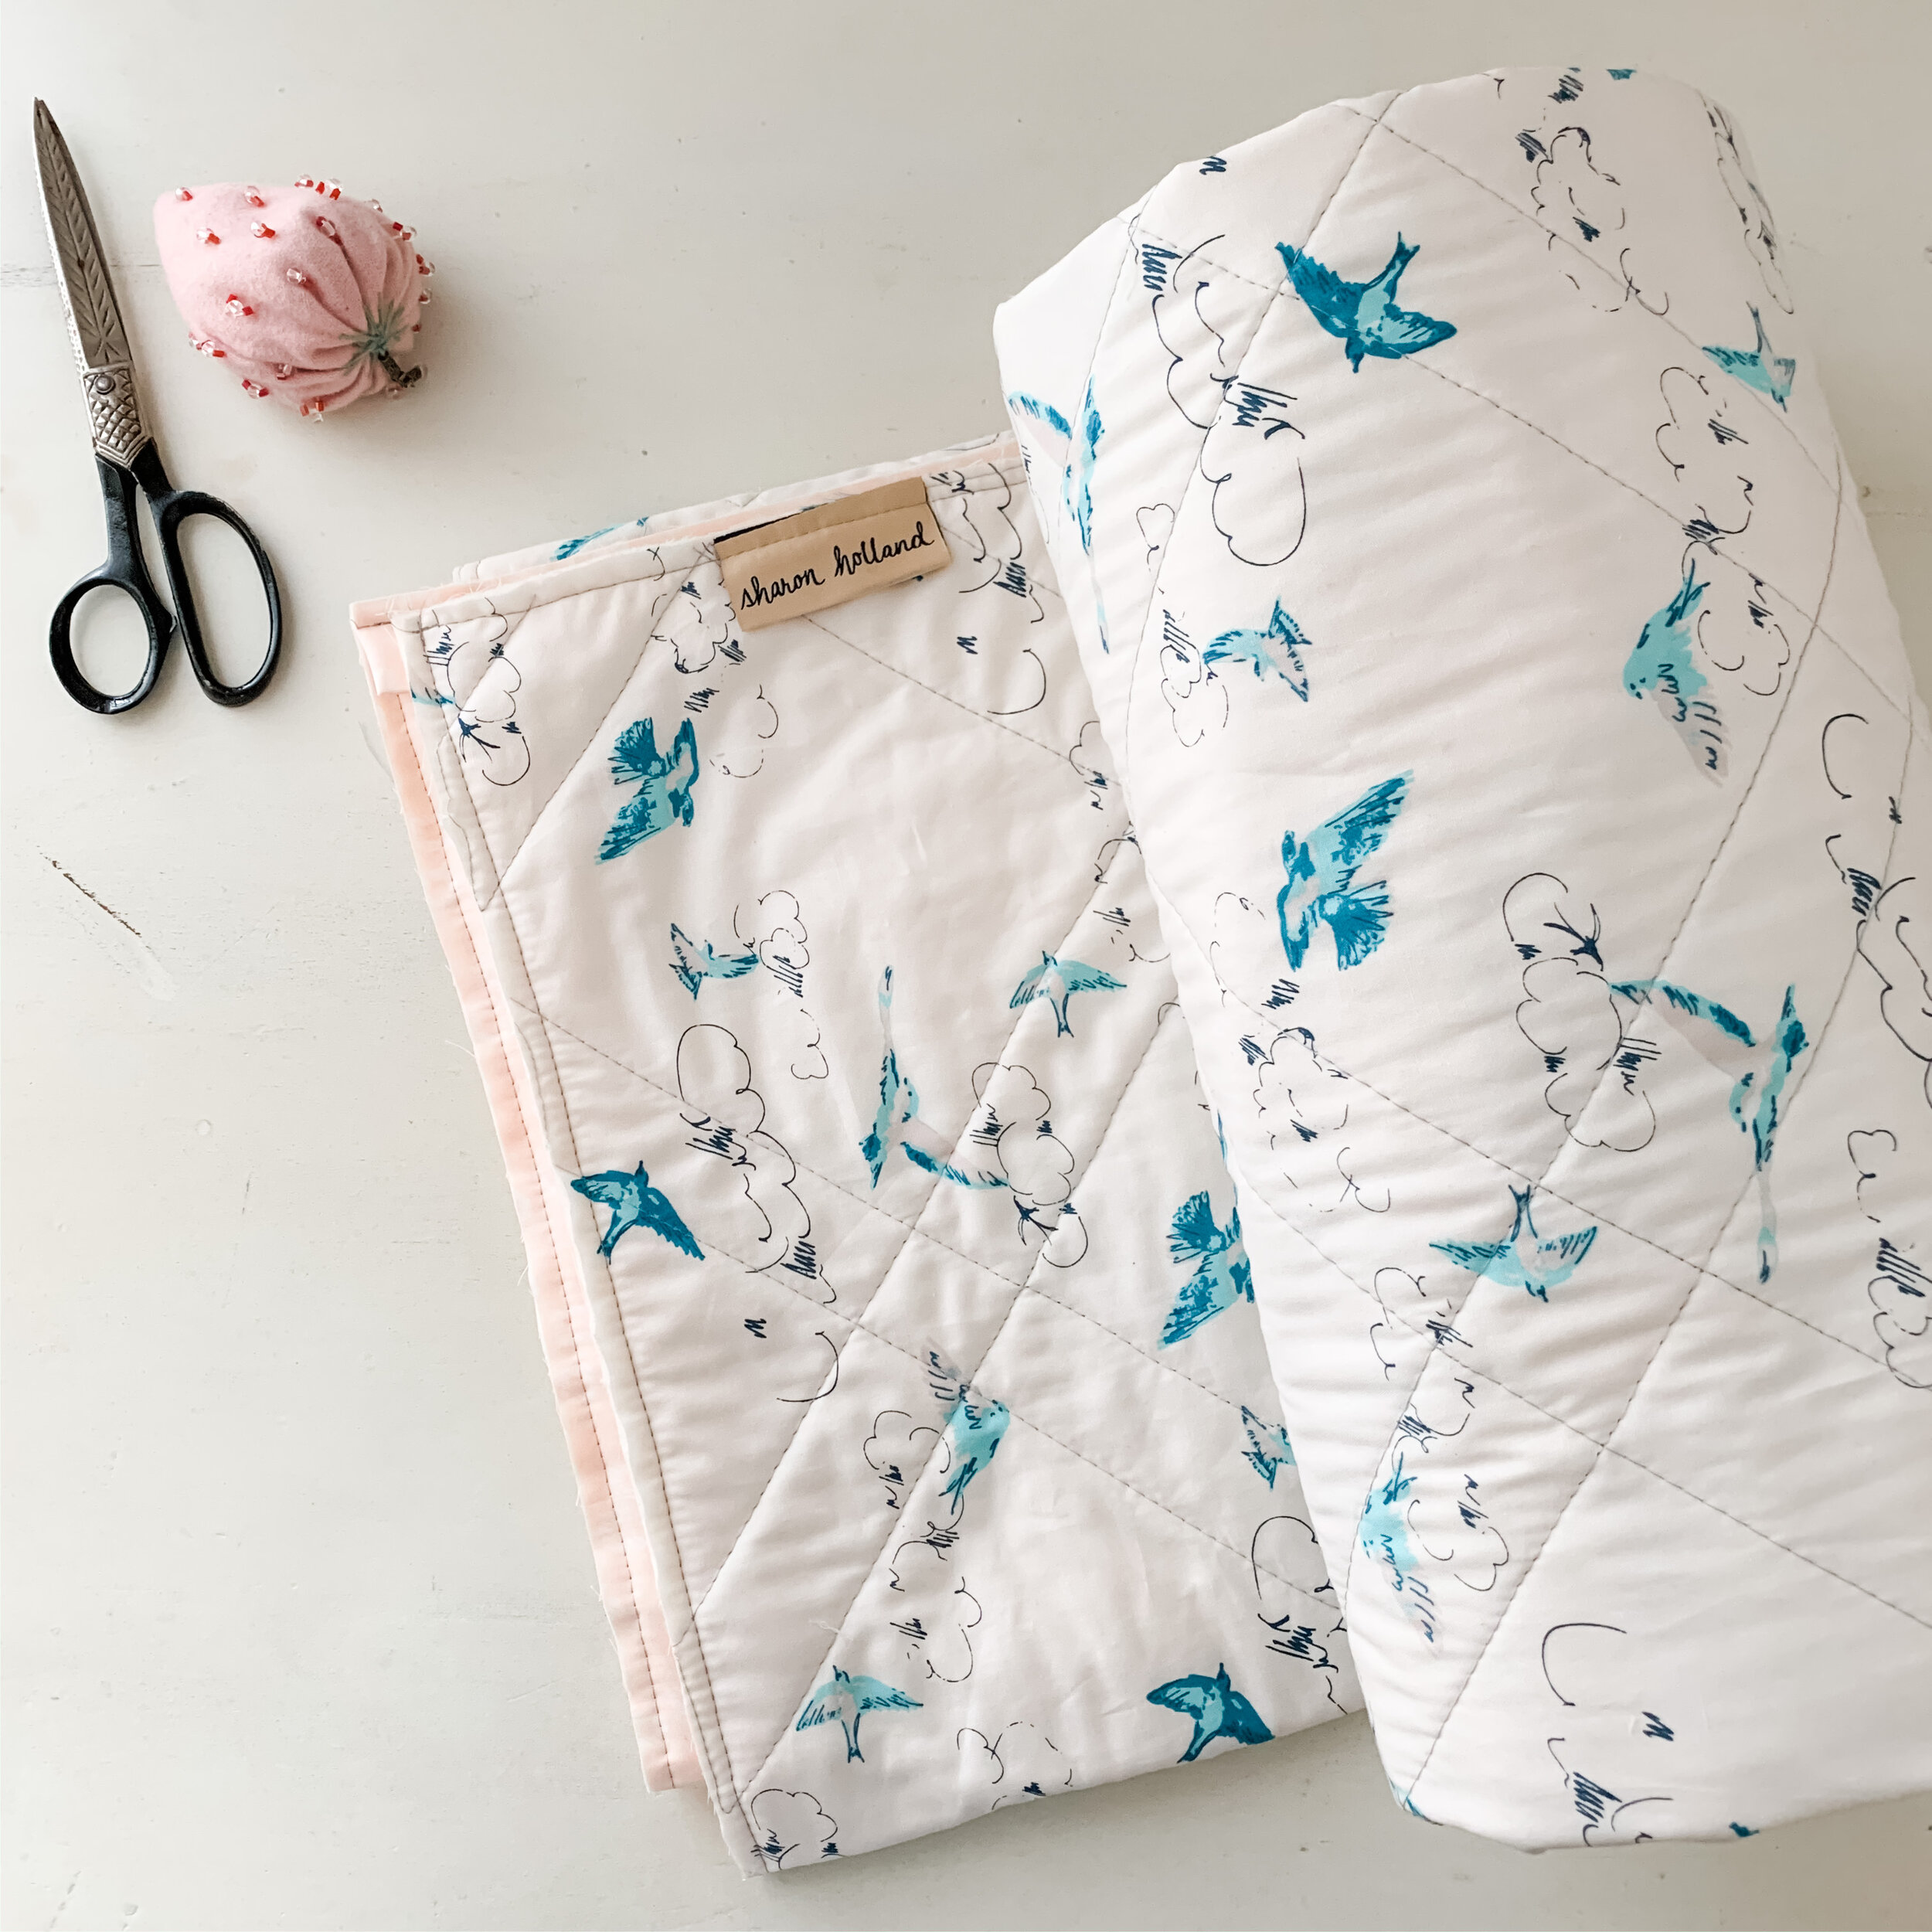
The backing on my quilt is from my Everlasting fabric collection for Art Gallery Fabrics and is called Summer’s Dance. For the binding I used Woodblock Ballerina that was also used for hearts.

Sugared Hearts Material List 2.jpg

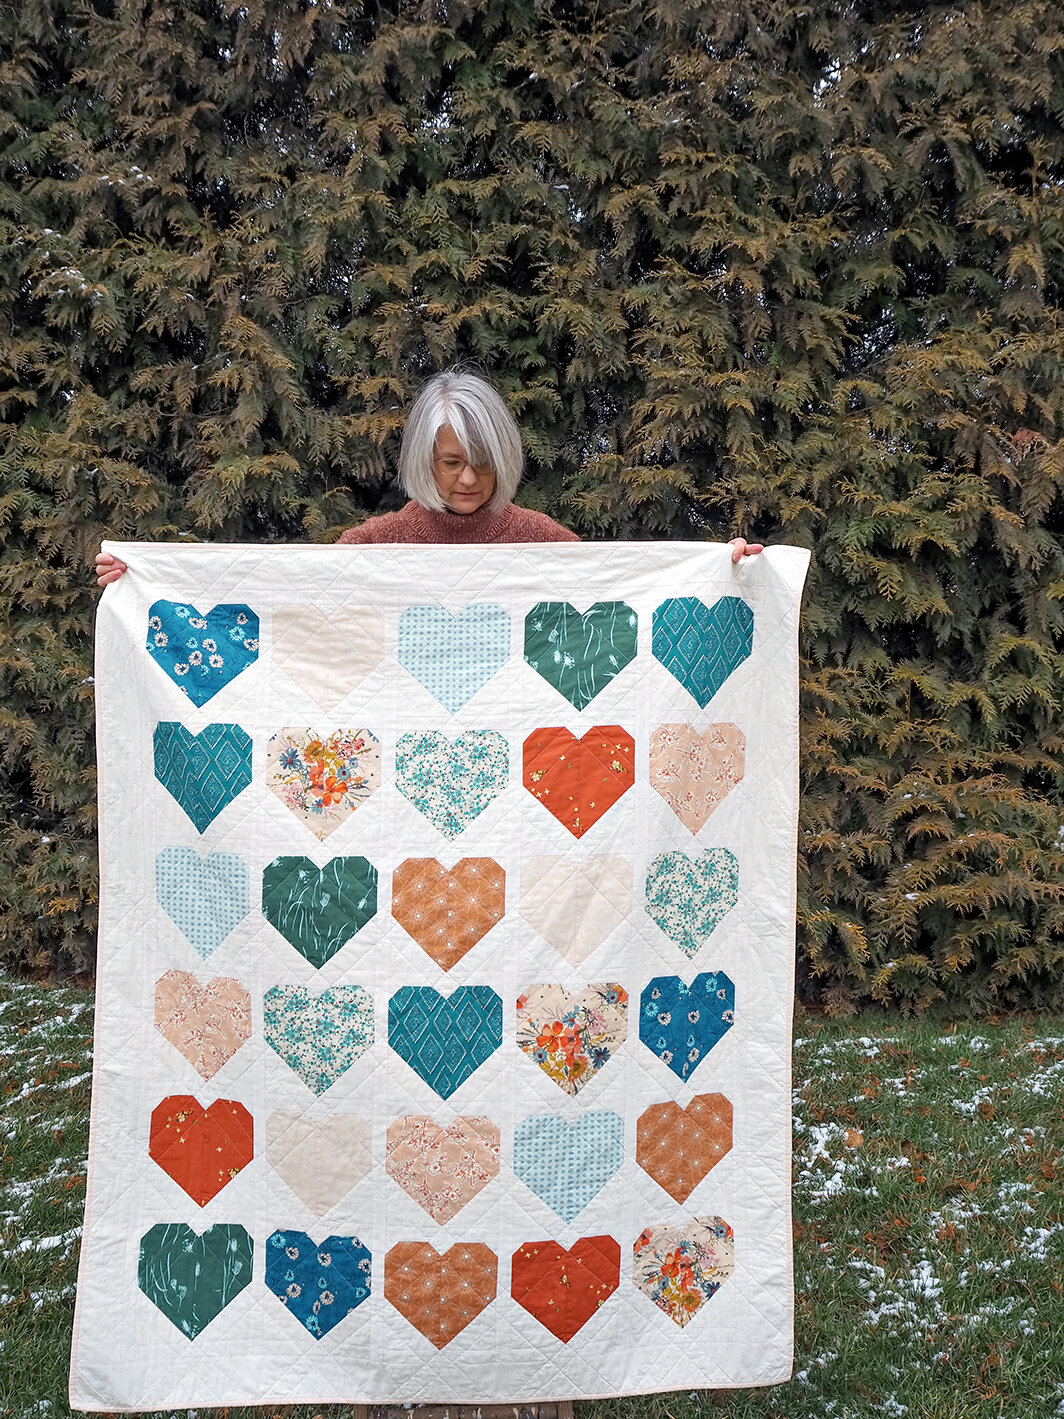
Here’s another look at the prints that went into my quilt. My Heart quilt’s stitched from a curated mix of fabrics from Art Gallery Fabrics Ballerina Fusion (a recolored mix of AGF designer prints), my Spirited, Everlasting, Signature, and Maureen’s Enchanted Voyage and Mystical Land collections.

My non-traditional Valentine colors remind me of sugared gum drops and candy. I’m crazy over this color palette and went with my heart when I did my fabric pull.

Sharon Holland Finished Heart Quilt-1.jpg

One of the biggest challenges of photographing quilts this time of year is the gloomy, cold weather. I had some grand plans for how to photograph this out doors but the wind didn’t cooperate. It started to rain shortly after we got these shots…

Heart Quilt Sharon Holland-1.jpg
 
Heart Quilt Sharon Holland-2.jpg

Be sure to check out Maureen’s blog to see her finished quilt top and bonus project from left over HSTs all made using a mix of Amy Sinabaldi’s MayFair and the new Foresta Fusion collection. Quilt kits for Maureen’s quilt are available at Lady Belle Fabric.

Photo and Heart quilt by Maureen Cracknell

Photo and Heart quilt by Maureen Cracknell

Bonus Project

Since I finished my quilt by Sunday I could’ve easily stopped there, written this blog post and moved on to the other projects stacking up on my desk but no—that’s too easy!

Pillow from HSTs-7.jpg

Remember in my Instagram Stories videos where I told you to hold onto those large half square triangle (HST) waste pieces???

Sharon Holland Finished Heart Quilt-2.jpg

I turned mine into this fun pillow! As a bonus, I’ll share with you how to make one (or more) for yourself!

The beauty of this type of project is that it can be customized to any size you want. I happened to have an extra rectangular pillow I wasn’t using anywhere in the house so I used it as my pillow form. It measures around 14’’ x 26’’ and is probably not a standard size.

Pillow from HSTs-5.jpg

I trimmed 36 HSTs to 3-1/2’’ square using my Bloc_Loc Ruler then arranged them into a design. I would’ve loved if the design was symmetrical but no such luck in this improv piece using scraps. I don’t really notice it now that the pillow is done.

I added 2’’-wide strips to the top and bottom to get it all up to the size I needed.

HST pillow  Chenille-it quilting.jpg

I’ve done a few projects on this blog where I’ve incorporated Chenille-it Blooming Bias and I can’t tell you enough how much I love this added texture—especially to pillows!

Pillow from HSTs-3.jpg

After stitching quilting lines to outline the chevron shapes 1/4’’ inside the seam allowances I added the 3/8 inch-wide Chenille-it to my pillow top. Stitching the blooming bias down not only adheres the product but also works as quilting.

Pillow from HSTs-2.jpg

I added two echo rows of chenille to the background areas. To read about how to stitch and then bloom the chenille, read more on my Chenille Pillow with Hidden Zipper post/tutorial. Plus, to see the gorgeous decorator pillows I made more recently with my Spirited Trail Marker print and Chenille-it, read HERE.

For more Chenille-it projects, here’s a fun You Tube video!

HST pillow.jpg

Personally I love a zipper closure on a pillow. Especially in a case like this where I’m using an existing pillow as the pillow form and like to switch out or clean the pillow covers regularly. You’ll find my go-to method for adding a hidden zipper on a pillow HERE. It’s insanely easy to do!

Sharon Holland Heart Quilt Finished-3.jpg

Now, not only do I have a heart quilt to snuggle under this Valentine’s Day but I have a coordinating pillow to go along with it!

Sharon Holland Heart Quilt Finished-1.jpg

Maureen and I want to thank you for sewing along with us and sharing your progress of your blocks to Instagram. We love seeing your work and encourage you to follow along, share, and tag when you post. Use the sew along hashtag of #agfLOVEquilt and be sure to tag @sharonhollanddesigns @maureencracknell and @cluckclucksew so we can see your progress! If you’re sewing with Art Gallery Fabrics don’t forget to tag them too as they love to see what Makers are making with @artgalleryfabrics !

Happy Valentine’s Day!

I am an Amazon Associate site and earn from qualifying purchases on the products I’ve linked below. The helpful products selected are the same or similar to materials used to make the project(s) in this blog post or related items I think you may enjoy.

Chenille Pillows

Chenille Pillows

Chenille pillows by Sharon Holland

Chenille pillows by Sharon Holland

It’s been a pretty intense couple of weeks here as I’ve been sewing and photographing for the Spirited Look Book coming out December 2, 2019. The Art Gallery Fabrics Look Books are a virtual magazine of inspiring projects made with fabrics from the newest collections. I’ve got about one more day to wrap everything up and take a little breather so this seemed like a good time to share my Chenille Pillow project with you before Thanksgiving week rolls around. Who knows, you may be looking for a quick decorating project to spruce things up before the holidays.

Extra Edited Chenille Pillows-2web.jpg

This is one of those projects that looks super high-end and difficult but is SO easy! I guarantee once you add chenille to a project you’ll want to chenille everything—the texture it adds is amazing and the application is as simple as doing a straight stitch on your sewing machine.

Here’s How to Make Chenille Pillows

Gather your supplies to make two pillows:

  • 5/8 yard SPT-85229 Trail Marker Range print fabric from Art Gallery Fabrics Spirited

  • 5/8 yard DEN-L-4000 Soft Sand Linen blend from Art Gallery Fabrics

  • Two rolls 3/8’’ -wide Chenille-It in Natural

  • Off-white thread (to match chenille)

  • Two 22’’ squares of cotton batting

  • Two 16” invisible zippers to coordinate with print or linen

  • Two 18’’ pillow forms (I used feather pillow inserts)

  • Spray baste

Chenille-It Blooming Bias

Chenille-It Blooming Bias

When I designed my Trail Marker print for Spirited I envisioned embellishing this print with embroidery or some sort of extra details to enhance the geometric-global design.

First I experimented with embroidery but wasn’t in love with the results and it was very time consuming. Then I tried needle punch embroidery but because of the tight weave of Art Gallery Fabrics cotton it was a big fail. I really wanted to see my vision come to life and remembered the wonderful Chenille-It product I used when sewing for my Signature collection Look Book. See the pillow tutorial made with Signature fabric and Chenille-It HERE.

Chenille-It is a blooming bias tape that gave me EXACTLY the look I wanted and is incredibly fast and easy to apply.

Chenille Pillows construction web-4.jpg

Chenille the Pillow Tops

  • Cut two 21’’ squares from the printed fabric. These will become the fronts for two pillows. Layer in this order: 22’’ square batting and 21’’ print square right side up. Spray baste according to the manufacturer’s instructions.

  • Working in one diagonal direction at a time and starting near the center of the layered fabric, apply the chenille by stitching down the center of the blooming bias tape, sewing through both fabric and batting layers. There’s no need to pin the bias tape down, I just eye-balled the diagonal line as I sewed. Trim bias to edge of fabric then start a new row parallel to the first.

Chenille Pillows construction web-2.jpg
  • Continue adding parallel bias strips that run in the same diagonal direction.

  • Repeat to attach blooming bias to the diagonal lines running in the opposite direction by crossing the tape right over the previously applied diagonal lines.

Chenille Pillows construction web-1.jpg
  • Once all the chenille bias tape has been sewn to the foundation, follow the instructions on the package to “bloom” the chenille. I lightly wet the stitched pillow top under the faucet to get it damp-wet and vigorously rubbed the chenille with my hand to fluff it before tossing into the dryer with some damp towels to bloom and fluff further by tumbling. In the photo above, the pillow top on the right has been fluffed lightly. I ended up fluffing it more when I bloomed the second top on the right that hadn’t been bloomed yet.

  • Carefully press the dried, bloomed pillow tops. Trim and square to 19’’.

Assemble Pillows

  • Cut two 19’’ linen squares for the pillow backs.

  • Referring to my Hidden Zipper tutorial, to finish the pillows using the 19’’ linen squares and 16’’ invisible zippers. Again, a hidden zipper sounds super intimidating but you’ll be amazed how easy this technique is and your pillows will have a professional, high-end look when finished.

Chenille pillows by Sharon Holland

Chenille pillows by Sharon Holland

 
Extra Edited Chenille Pillows-5web.jpg

Be watching for the Spirited Look Book coming the first week of December and find more inspirational sewing projects for your home and family.

Have a happy Thanksgiving!

Spirited fabrics by Sharon Holland

Spirited fabrics by Sharon Holland


Everlasting Blog Tour

Everlasting Blog Tour

Everlasting_blog tour square.jpg

I’m so excited for next week when the Everlasting Blog Tour officially begins! Thirteen incredible designers and sewists from around the globe have been busy stitching behind the scenes to make this upcoming blog tour truly remarkable.

Everlasting by Sharon Holland rolls.jpg

This May saw the release of Everlasting, my seventh fabric line for Art Gallery Fabrics. Romantic, summer-inspired prints make sewing easy with a classic palette of navy, red, turquoise, and blush. Everlasting has been a huge success and is available in shops everywhere. See FABRICS page for stock listings of online shops.

I knew right away I wanted this collection to have a blog tour and coordinated a list of wonderfully talented makers to share their love of stitching with all of us. Here in the States we’re enjoying summer and I know I’d love these long, lazy days to never end. So, to keep those summer vibes going, over the next three weeks you’ll find inspired sewing posts, exciting makers to follow, beautiful projects, and of course, weekly giveaways all focused around my Everlasting fabric collection—you won’t want to miss a day!

EVERLASTING BLOG TOUR SCHEDULE

Friday, July 12 - Sharon Holland

Monday, July 15 - Marija Vujcic

Tuesday, July 16 - Carolina Moore

Wednesday, July 17 - Dana Willard

Thursday, July 18 - Lisa Ruble

Friday, July 19 - Dritz Sewing

Monday, July 22 - Eleri Kerian

Tuesday, July 23 - Marisa Wilhelmi

Wednesday, July 24 - Sharon McConnell

Thursday, July 25 - Modernly Morgan

Friday, July 26 - Alexis Wright

Monday, July 29 - Priscilla Geissler

Tuesday, July 30 - Maureen Cracknell

Wednesday, July 31 - Elina Temmes

Everlasting Blog Tour photo.jpg

My Blog Tour Makes

You know I couldn’t host a blog tour without contributing so this pre-blog tour post is also my opportunity to share my new Everlasting makes with you.

I was originally planning on making a new free quilt pattern for the tour but decided instead to make hand quilted pillows. I’ve been wanting to make a Pineapple block for ages and pillows seemed the perfect application! Also, these pillows are going to be gifted to a friend and it’s a win-win when I can make a project, blog about it, and use the finished piece as a gift!

Everlasting Pineapple pillows by Sharon Holland

Everlasting Pineapple pillows by Sharon Holland

It was very tempting to use more than just one print from this collection but I wanted to keep these pillows very classic and slightly rustic. Red and white, or in this case natural with Art Gallery Fabrics Linen and the bold red Flutter Buds cotton print. Besides, you’ll see the rest of the prints in action during the tour from the other makers!

Pillow Materials.jpg

To get perfect Pineapple blocks I used the Bloc_Loc Pineapple Ruler and it was so easy! Simply cut strips to a desired width depending upon your ruler size. I have the 3/4’’ - 1-1/2’’-size ruler and cut according to the 1-1/2’’ size to make a 21’’ square for my pillow top. Bloc_Loc has a helpful video, cutting charts, and printable instructions.

Once the piecing was done and my block measured 21’’ (unfinished) I basted a 23’’ square of Hobb’s Tuscany Silk batting scrap to the wrong side of the blocks. I didn’t use any backing because it is intended for a pillow and not having the backing reduced the bulk for hand quilting.

I hand quilted with DMC #8 Perle Cotton thread in ecru for a more traditional look. Once both blocks were quilted I used my Hidden Zipper tutorial to add Dritz Sewing brass zippers, giving a professional finish to my pillow covers. The finished size of my pillows is 20’’ square.

24’’ Brass Upholstery Zipper by Dritz Home

24’’ Brass Upholstery Zipper by Dritz Home

Everlasting Pillows 1.jpg

With the insertion of feather pillow inserts these pillows have a high-end designer quality to them and I cannot wait till I can give them to my friend—she’s going to love them! She loves red, too!

Everlasting Pineapple Pillows by Sharon Holland

Everlasting Pineapple Pillows by Sharon Holland

My next make to share was created because I love easy-to-wear summer dresses and had the strong desire to stitch something for myself. My daughter and I wear basically the same size and have similar tastes in clothing. In fact, our tastes are so similar that we bought the same dress, in the same print, on the same day, and we live a state away from each other. We both liked how it fit us so I had the big idea to use it as a template and try to make a knit dress with it.

Everlasting Pillows and Knit Dress.jpg

Now, I don’t want to take any business away from pattern companies or Indie pattern designers. This project may actually do more to encourage you to BUY a pattern rather than make your own hack like I did because after finishing the first one I really want to make more adjustments to my pattern and try it all again. Never the less, I will quickly go over my not-so-skilled hack and let you be the judge.

Dress Pattern Hack by Sharon Holland.jpg
  1. I used the grid side of a roll of gift wrap as my template paper because it was wide enough to accommodate the store-bought dress (once I get my final templates I’ll transfer it to freezer paper, so it’s sturdier). With the dress inside out, I taped it down to the paper with washi tape, trying not to stretch it out of shape.

  2. I drew the shape of the dress, adding a 1/2’’ seam allowance and marking the back and front necklines. I cut out the shape using the taller back neckline and then folded the cut out in half. Once folded I could do more cutting to mirror image the sides. After cutting the mirrored shape down the center (where it will be placed on the fold of the fabric) I went ahead and designated one side as the back (higher neckline) and the other I cut a lower neckline for the front of the dress. From paper scraps I cut out the pocket shape. For a great tutorial on sewing pockets into a garment visit Dana Willard’s Made Everyday You Tube channel.

  3. Finally I took a piece of rope and roughly measured around the neck and arm openings to determine the length of binding needed to finish the garment openings. Use a straight ruler to determine the amount determined with the rope and add 1’’ to that total for seam allowance. Since I’m sewing with knit fabric I simply cut my binding on the straight of grain from selvage to selvage. I cut 1-3/4’’ wide strips.

Everlasting Flutter Buds knit by Sharon Holland

Everlasting Flutter Buds knit by Sharon Holland

Overall it wasn’t a bad first attempt and some very minor tweaks may yield just the perfect fit.

Everlasting Flutter Buds Knit dress.jpg

I do love this Flutter Buds print in blue knit and so does my daughter so we’ll both have one to wear this summer. I also want to make myself one in the red Cherished Wishes knit print. There’s enough unused fabric from my dress attempt that my granddaughter will be getting a summer dress(s) to match!

Everlasting by Sharon Holland for Art Gallery Fabrics

Everlasting by Sharon Holland for Art Gallery Fabrics

The extremely talented Marija Vujcic will be leading off the Everlasting Blog Tour on Monday, July 15th. Be sure to stop by each of the makers blogs to get the full story about their Everlasting makes and get to know these incredible women even more.

Blog Tour Giveaways!

I know you follow me on Instagram and I’ll be posting daily to keep you in the know about the tour. Each weekend I’ll have a weekly recap here on the blog and announce the special giveaway that week from one of our sponsors! Dritz Sewing, Bloc_Loc Rulers, and Fat Quarter Shop have generously offered fabulous prizes to be given away during the tour.

You’ll have two chances to win each week!

  1. One chance is here on the blog by leaving comments on the weekly recap posts (see details coming next weekend).

  2. The second chance is on Instagram. Starting today (Friday, July 12) if you repost any of the tour makers projects (including mine or any of the tour graphics) posted during the Everlasting Blog Tour, tag the project’s maker with their IG account, #ArtGalleryFabrics, and use the #EverlastingBlogTour hashtag on a public Instagram account and you’ll automatically be entered into all the IG giveaway drawings for this tour! Enter as many times as you’d like by reposting blog tour images—just be sure to give tour makers proper credit and tag them in your repost.

More details about giveaways, how to enter, and giveaway drawings will be announced at time of giveaways.

Yo-Yo Pillow

Yo-Yo Pillow

Signature Yo-yos Pillow.jpg

The final installment in my pillow series is this fun Yo-Yo Pillow. Yo-yos and pillows made from yo-yos are nothing new but it's something I've not seen done for awhile and there may be lots of new sewers out there that don't know how to make them.

Making Yo-yos.jpg

Yo-yos are hand stitched from circles of fabric. I used a 6'' diameter circle to make mine but you can use whatever size you'd like. The smaller the starting circle, the smaller your finished yo-yo will be. They shrink considerably once stitched up and my finished yo-yos measured around 2-1/2'' across.

Yo-Yo Pillow

Materials needed to make an 18'' square finished pillow

  • For front foundation and backing: Two 18-1/2'' squares for 1/4'' seams Lapped Zipper Back or two 19'' squares for 1/2'' seams Hidden Zipper back
  • For yo-yos: Sixty-four 6'' diameter fabric circles
  • One 14'' invisible zipper
  • Aleene's No-Sew Fabric Glue
  • One package 1/4'' -wide Dritz Wash Away Wonder Tape
  • Zipper foot attachment
  • Needle and thread
  • Embroidery thread and needle
  • Marking tool and ruler
yo-yos pink-01.jpg

Knot the end of a length of thread. Hiding starting knot on the wrong side of the fabric, turn circle edge 1/4'' under to wrong side while hand basting a running stitch 1/8'' from edge. Leave thread in needle and do not knot end when basting stitch reaches the starting knot. 

Pull loose thread end to gather, forming a yo-yo. The gathered edge will be pulled to the center. 

yo-yos pink-02.jpg

Flatten the yo-yo, centering the gathered closure. Secure thread with a double knot and hide thread inside the yo-yo. Make a total of 64.

signature yoyos.jpg

There's a few ways you can connect your yo-yos for a pillow top. One way would be to stitch the yo-yos together with tiny stitches along the edges at four points like a compass then attach the connected circles to the pillow top. 

Another way would be to blanket stitch the yo-yos to the pillow foundation (leaving the appropriate 1/4''-1/2'' seam allowance around the edges of the foundation for pillow assembly.

I chose a middle road and "X" stitched my yo-yos directly to the foundation at four points. 

Signature pillow assembly.jpg

Since I only had an 18-1/2'' square piece of Art Gallery Fabrics Apricot Sunrise Smooth Denim I needed to take care not to stitch my yo-yos in the 1/4'' seam allowance area. I used the 1/4'' mark on my Omnigrid ruler as a guide. 

Since my yo-yos aren't perfectly sized and I wasn't sure if the amount made would fit my pillow foundation I wanted to have all the yo-yos in place before I started sewing. To keep my yo-yos in place without pinning, I put a dab of Aleene's No-Sew Fabric Glue on the back of each yo-yo and worked from the outside edges of the foundation in toward the center.

Signature pillow assembly 1.jpg

Once all in place and working on a flat surface, I hand stitched the yo-yos to the foundation with 3-ply strands of Aurifloss embroidery thread. Tip: Leave the side of the yo-yo nearest the foundation raw edge unstitched until after pillow is assembled. By leaving these sides free, the edge yo-yos can be folded in toward the center of the pillow durning assembly and stay free of the seam allowance area.

yo-yo Signature fabrics.jpg

Stitch at four points and secure on back with double knots. 

hand stitching.jpg

Assemble the pillow using either my Lapped Zipper Back or Hidden Zipper tutorials.

I finished my pillow with a lapped zipper back in Signature fabrics Extempore Gala canvas.

Lapped Back Zipper.jpg


After the pillow has been assembled, go back and finish hand stitching the edge yo-yos to the pillow. Insert an 18'' square pillow form.

Signature Yo-yo Pillow 3.jpg

Hand stitching yo-yos is a great take along pastime and perfect for lazy summer days of relaxing, mindless sewing on the go or just sitting at home. 

Signature Yo-yo Pillow 2.jpg

I hope you enjoyed these pillow projects. I've still more projects to post here before the Signature Look Book is published so come back and visit real soon for more summer sewing ideas.